


What is Jenkins?
Jenkins is an open-source automation server that simplifies the software development process. Here's a simple explanation with key points:
Automation: Jenkins automates repetitive tasks like building, testing, and deploying software.
Continuous Integration: It integrates code changes from multiple developers into a shared repository, ensuring early detection of issues.
Continuous Delivery: Jenkins automates the deployment of applications to various environments, making the process faster and more reliable.
Plugin-based: Jenkins offers a wide range of plugins to extend its functionality and integrate with different tools and technologies.
Build Pipelines: It allows the creation of complex pipelines to define and manage the steps involved in the software build and deployment process.
Scalability: Jenkins can scale horizontally to handle larger projects and distributed teams.
User-friendly Interface: Jenkins provides a web-based interface to manage jobs, configure settings, and view build results.
Extensibility: It can be customized and extended using plugins and scripts to meet specific project requirements.
Active Community: Jenkins has a large community that contributes plugins, provides support, and shares best practices.
Open Source: Jenkins is freely available and continuously improved by the community, making it flexible and adaptable for different use cases.
In summary, Jenkins automates and streamlines the software development lifecycle, enabling faster and more efficient delivery of high-quality applications.
To install Jenkins on an EC2 instance with easy understanding, follow these simplified steps:
Launch an EC2 instance: Go to the AWS Management Console, launch an EC2 instance, and choose an appropriate operating system like Ubuntu or Amazon Linux.
Connect to the instance: Use SSH or any preferred method to connect to your EC2 instance.
Update the system: Run the command
sudo apt-get updateto update the system packages.Install Java: Jenkins requires Java to run. Install it by running
sudo apt-get install default-jdk.Jenkins Keys: Import the Jenkins GPG key to verify the integrity of Jenkins packages by running the following command:
   curl -fsSL https://pkg.jenkins.io/debian-stable/jenkins.io-2023.key | sudo tee \
     /usr/share/keyrings/jenkins-keyring.asc > /dev/null
Add Jenkins repository: Add the Jenkins repository to your system by running these commands:
 echo deb [signed-by=/usr/share/keyrings/jenkins-keyring.asc] \
     https://pkg.jenkins.io/debian-stable binary/ | sudo tee \
     /etc/apt/sources.list.d/jenkins.list > /dev/null
Install Jenkins: Run
sudo apt-get updateto refresh package lists, then install Jenkins withsudo apt-get install jenkins.Start Jenkins: Start the Jenkins service with
sudo systemctl start jenkins.Enable Jenkins: Enable Jenkins to start automatically on system boot with
sudo systemctl enable jenkins.Access Jenkins: Open a web browser and enter your EC2 instance's public IP address followed by port 8080 in security group.
Unlock Jenkins: On the Jenkins web page, you will be prompted to enter the initial admin password. Retrieve the password from your EC2 instance by running:
sudo cat /var/lib/jenkins/secrets/initialAdminPasswordFollow the setup wizard: Enter the initial admin password on the Jenkins web page and follow the setup wizard to complete the installation. Install recommended plugins and set up an admin user.
Customize Jenkins: Once the setup is complete, you can customize Jenkins by installing additional plugins, configuring global tools, and creating Jenkins jobs.
Remember to refer to the official Jenkins documentation or AWS documentation for detailed instructions tailored to your specific EC2 instance and operating system.
Create a freestyle pipeline to print "Hello World!!"
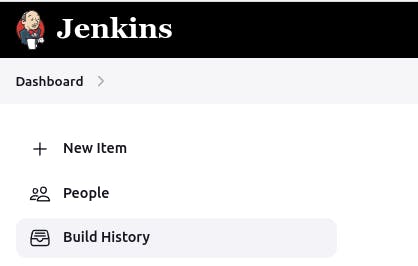
Click on "New Item" to create a new Jenkins job.
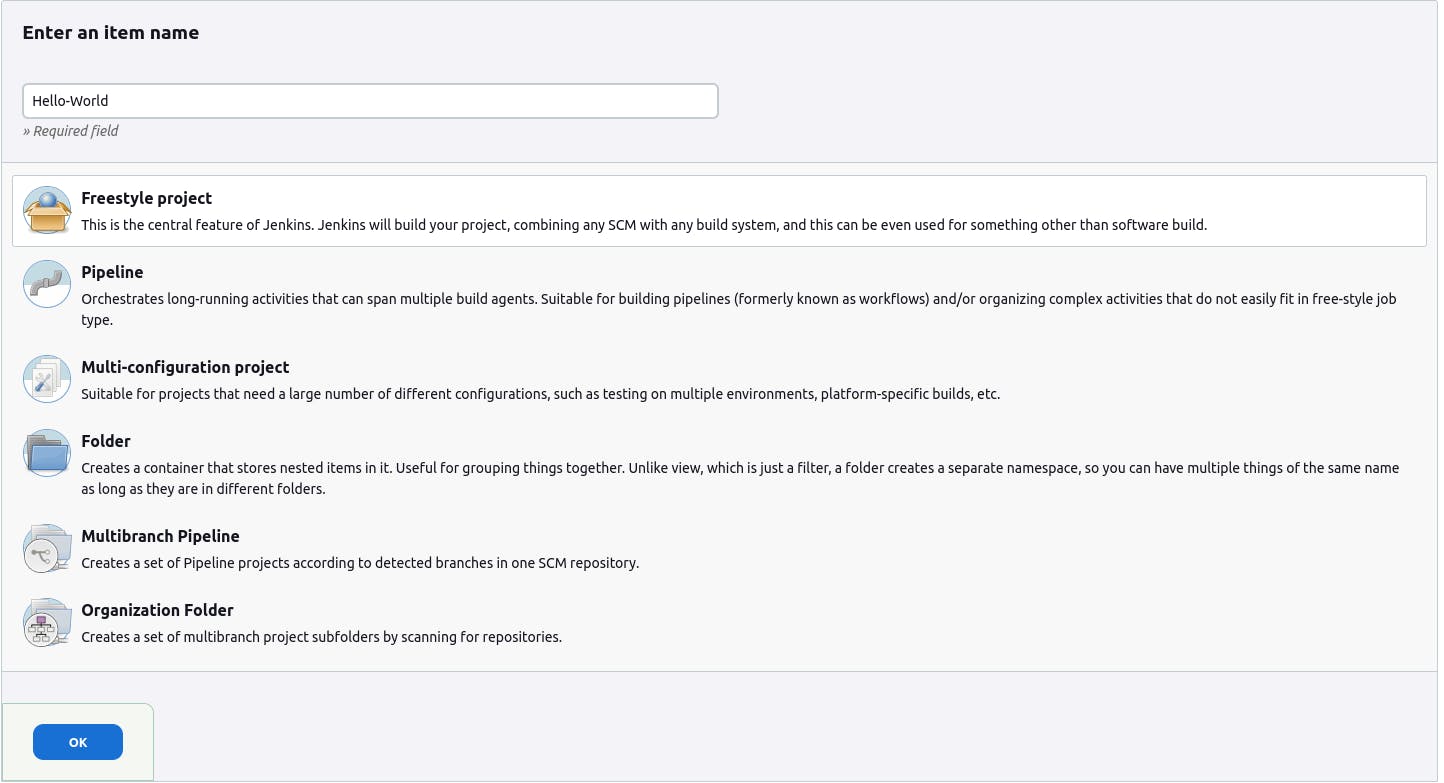
Enter a name for your job, select "Freestyle project", and click "OK".
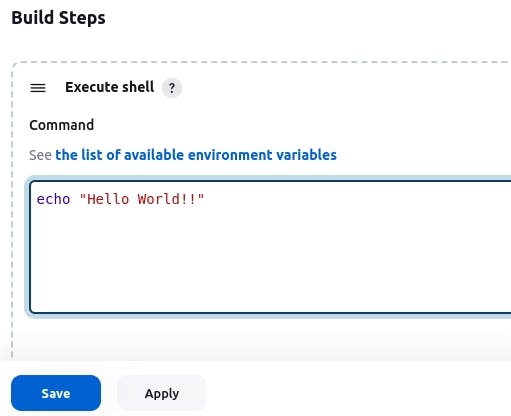
In the configuration page, scroll down to the "Build" section and click on the "Add build step" dropdown.
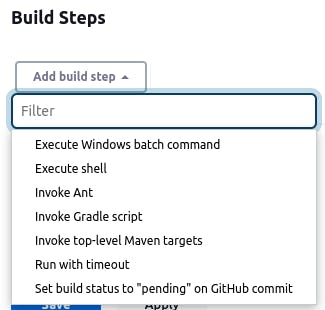
Select "Execute shell" from the dropdown.
In the "Command" field, enter the following command:
echo "Hello World!!"Save your configuration by clicking on "Save" or "Apply".
Now you can run the pipeline by clicking on "Build Now".
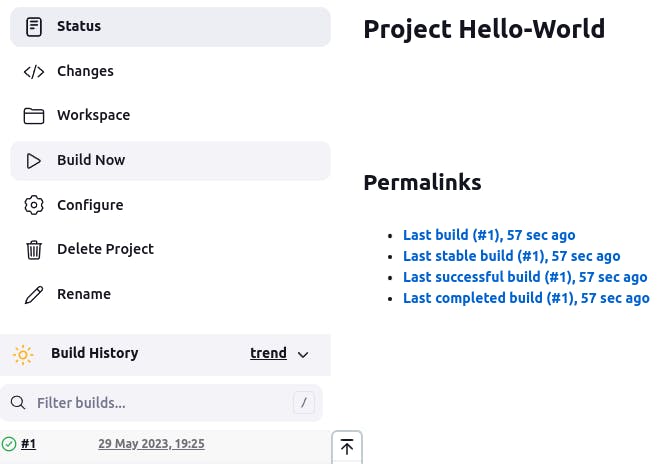
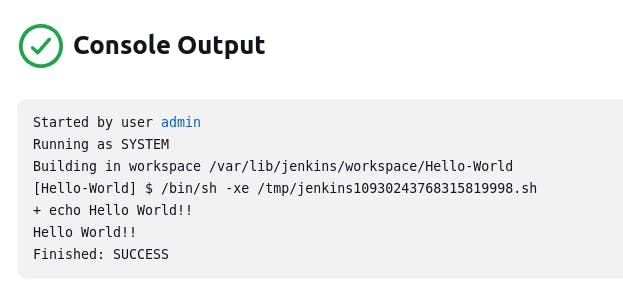
Once the job is triggered, Jenkins will execute the shell command and print "Hello World!!" in the console output.
Thank you for reading. I hope you were able to understand and learn something new from my blog.
Happy Learning!
Please follow me on Hashnode and do connect with me on LinkedIn ArnavSingh