

Table of contents
Amazon RDS
AWS Relational Database Service (RDS) is a cloud-based managed service provided by Amazon Web Services (AWS) that simplifies the process of setting up, operating, and scaling relational databases. RDS supports popular database engines like Amazon Aurora, MySQL, PostgreSQL, Oracle, and Microsoft SQL Server.
AWS RDS takes away the complexity of managing relational databases. Instead of setting up and maintaining your own database infrastructure, RDS handles the heavy lifting for you. It provides automated backups, software patching, and database scaling, allowing you to focus on your application rather than database administration.
With RDS, you can easily create a database instance with just a few clicks in the AWS Management Console. RDS manages tasks like database installation, software updates, and backups, reducing the operational burden on your part. You can choose the database engine that best suits your application requirements.
Task-01
Create a Free tier RDS instance of MySQL
Create an EC2 instance
To create a free tier RDS instance of MySQL, follow these steps:-
Open the AWS Management Console.
Navigate to the RDS service by searching for "RDS" in the AWS services search bar and selecting "RDS" from the results.
Click on the "Create database" button to start the database creation process.

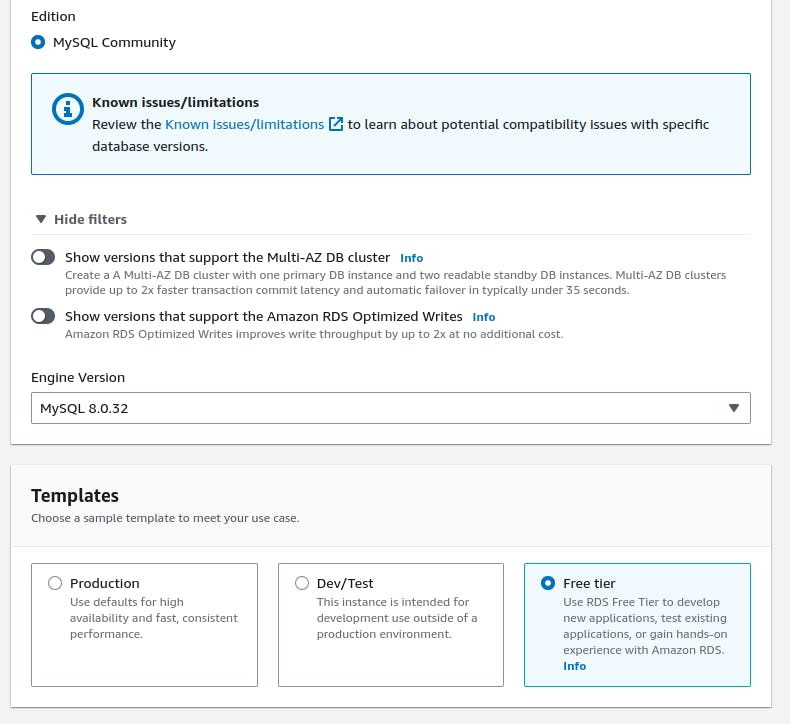
- In the "Engine options" section, select "MySQL" as the database engine.

- Under "Templates," select the "Free tier" template to ensure you create a free tier eligible instance.
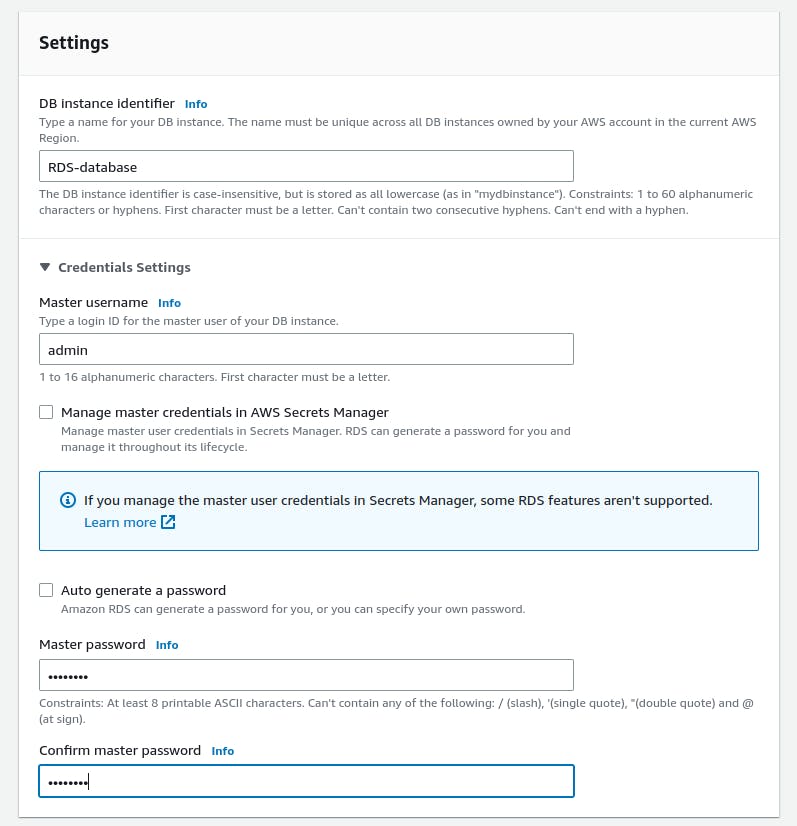
In the "Settings" section, provide a unique and meaningful name for your database instance.
Set a master username and password for the database. Remember to choose a strong password.
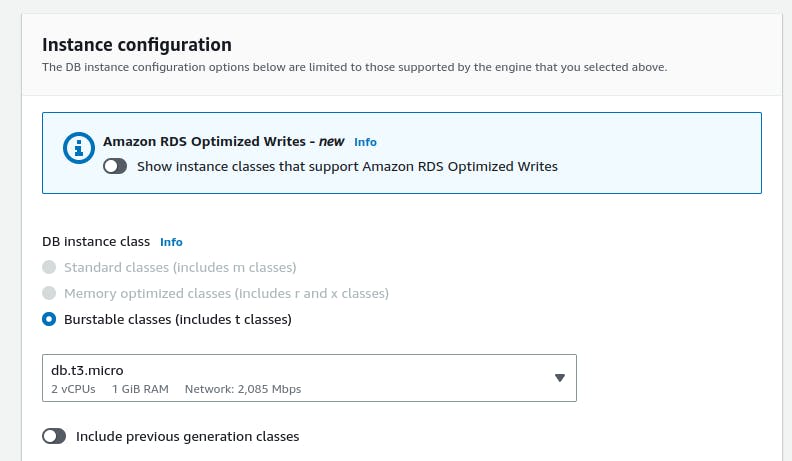
- Configure the remaining settings according to your needs, such as the instance size, storage type, and allocated storage.

- In Connectivity, compute resource as EC2 compute resource.
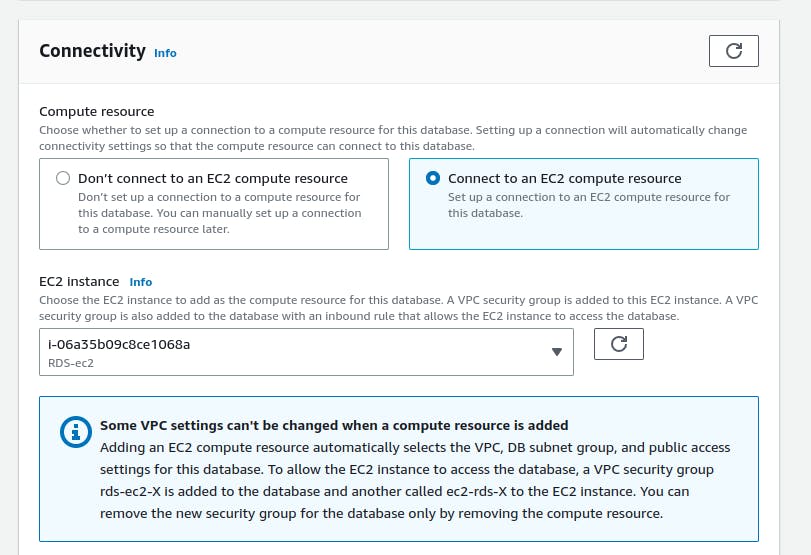
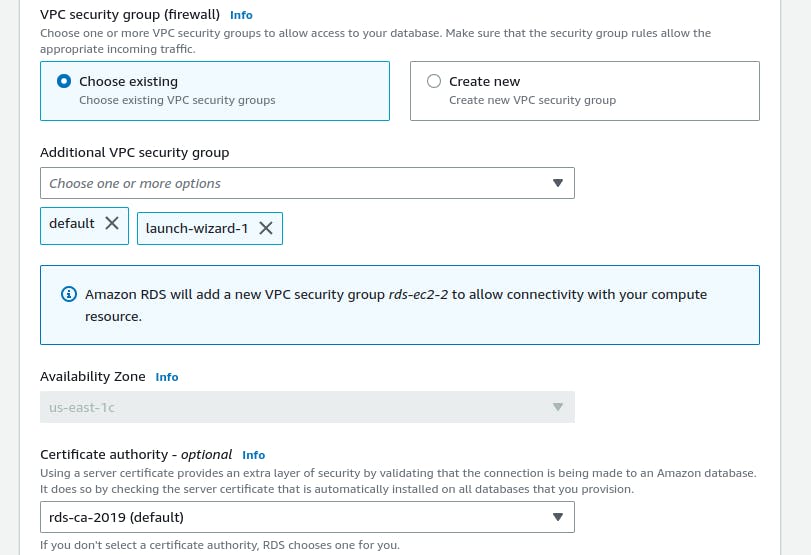
- Scroll down to the "Network & Security" section and choose the appropriate VPC, subnet, and security group settings.
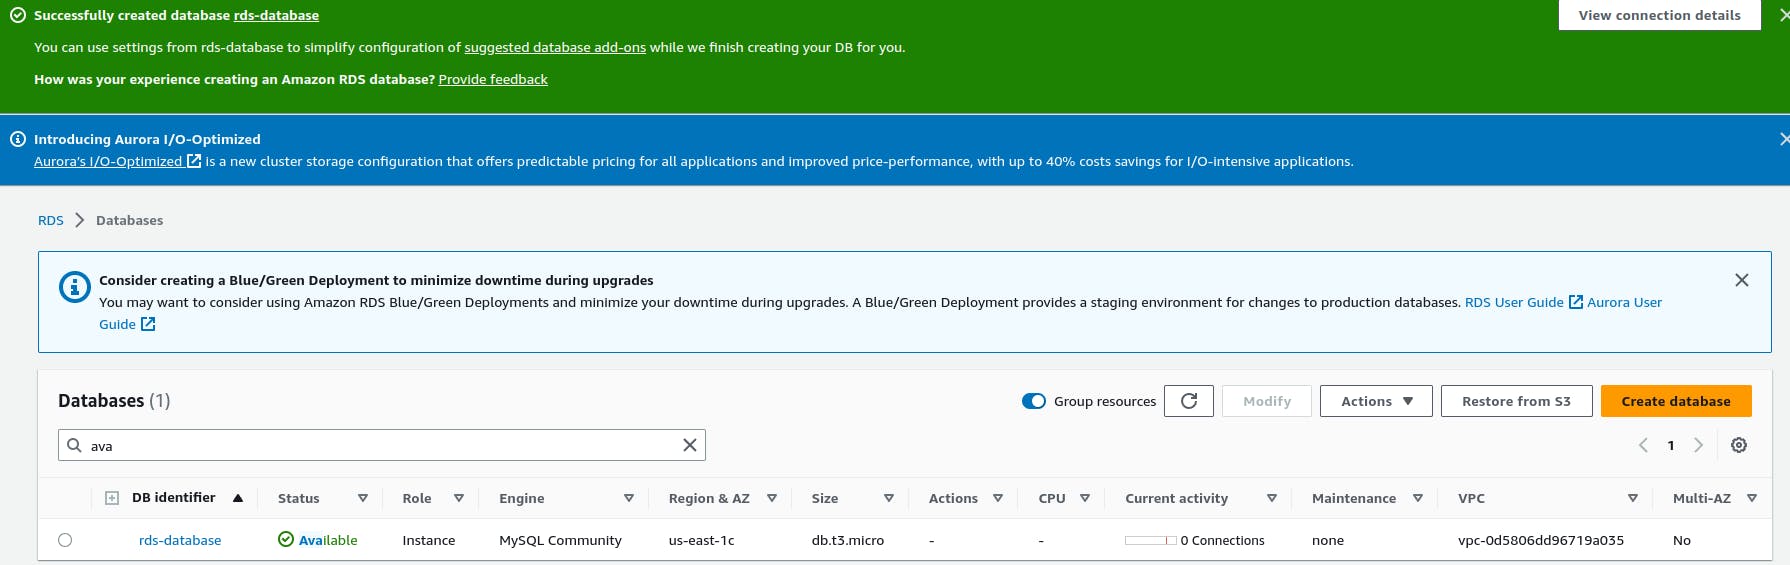
Finally, click the "Create database" button to initiate the creation of the free tier RDS instance.
Wait for the RDS instance to be created. The process may take several minutes.
Create an IAM role with RDS access
To create an IAM role with RDS access, follow these steps:-
Navigate to the IAM service by searching for "IAM" in the AWS services search bar and selecting "IAM" from the results.
In the IAM dashboard, select "Roles" from the left-hand navigation pane.
Click on the "Create role" button to start creating a new IAM role.

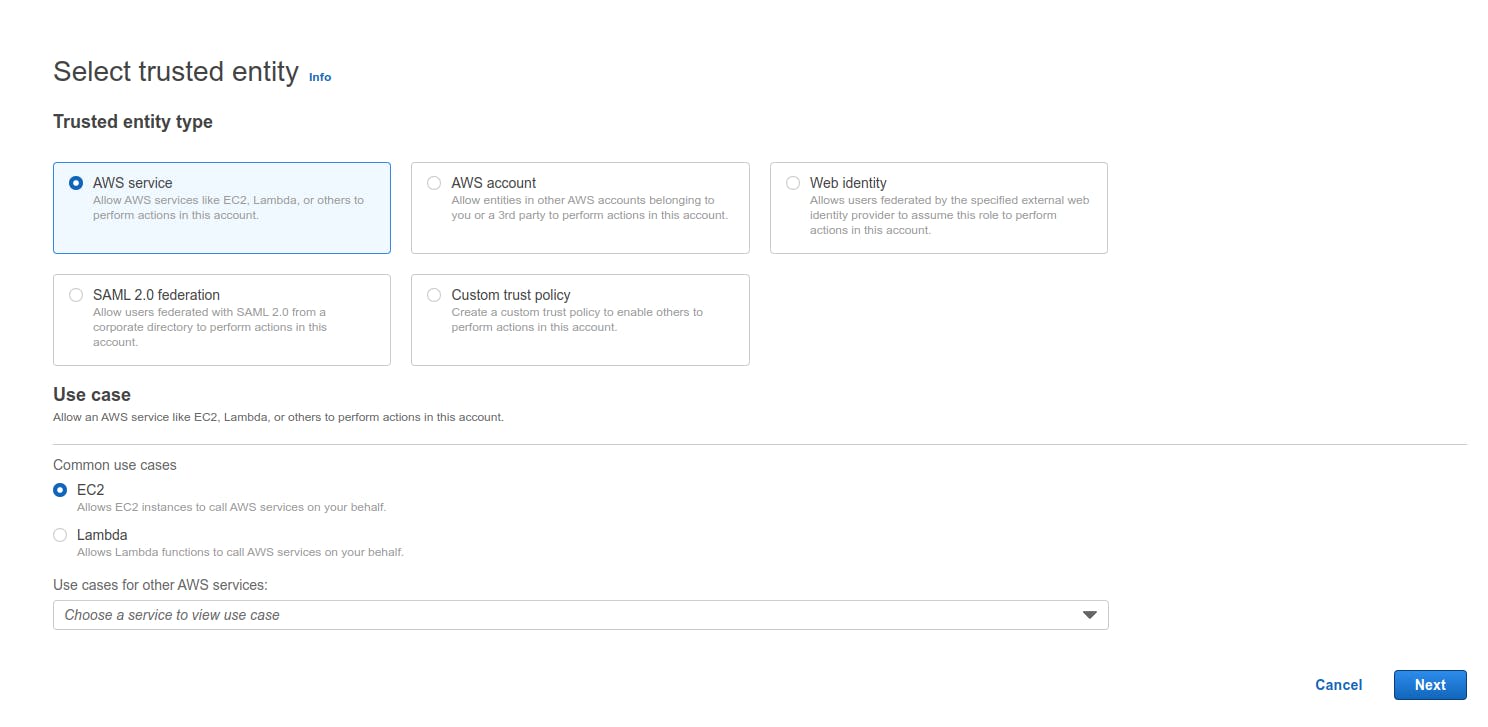
In the "Select type of trusted entity" section, choose the service or entity that will use this role. Since we want to grant RDS access, select "AWS service" as the trusted entity.
Under "Choose a use case," select "EC2" from the list of services.
Click on the "Next: Permissions" button to proceed to the next step.
In the "Attach permissions policies" section, choose an existing policy that grants the necessary RDS permissions like "AmazonRDSFullAccess".

After selecting the desired policy, click on "Next".
Provide a unique and meaningful name for the IAM role and optionally add a description.
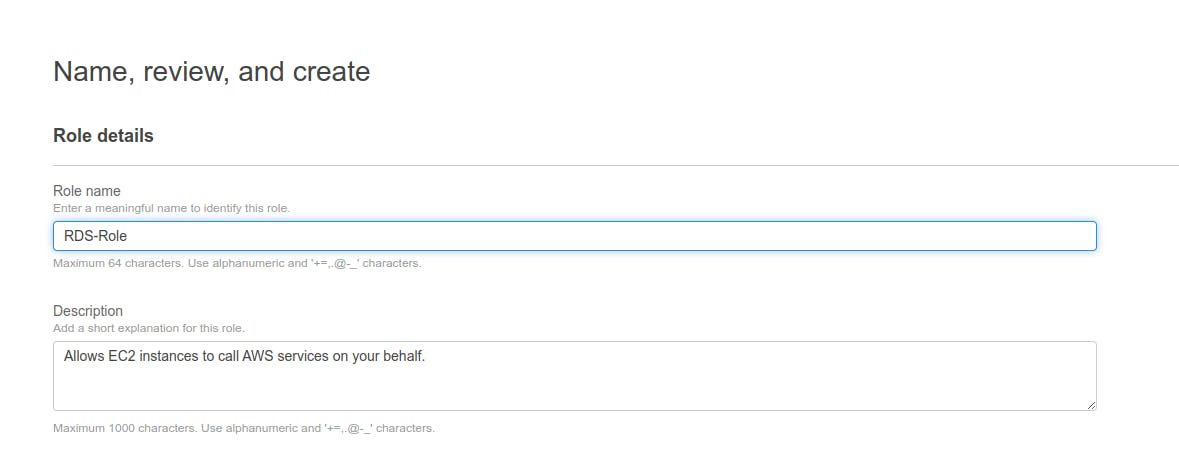
Review the details of the IAM role to ensure they are accurate.
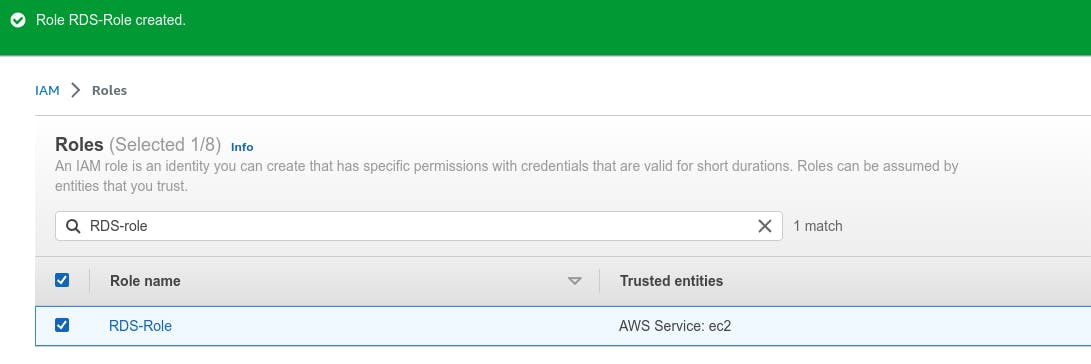
Click on the "Create role" button to create the IAM role with RDS access.
Assign the role to EC2 so that your EC2 Instance can connect with RDS
To assign the IAM role to an EC2 instance so that it can connect with RDS, you can follow these steps:
Navigate to the EC2 service.
In the EC2 dashboard, select "Instances" from the left-hand navigation pane.
Locate the EC2 instance to which you want to assign the IAM role.
Actions->Security->Modify IAM role
Select IAM which we created and click on update IAM role

The IAM role is now attached to the EC2 instance, and the necessary permissions are granted to allow the instance to connect with RDS.
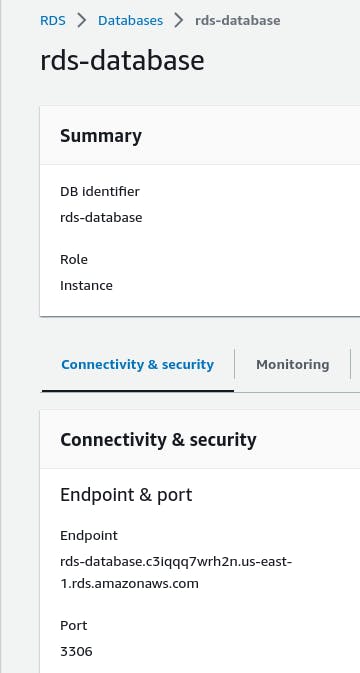
Once the RDS instance is up and running, get the credentials and connect your EC2 instance using a MySQL client.
SSH into your EC2 instance using a terminal.
Install a MySQL client on the EC2 instance.
To install the MySQL client on EC2 instances:
sudo apt-get update
sudo apt-get install mysql-client
- check whether MySQL is installed or not by running the below command.
mysql --version

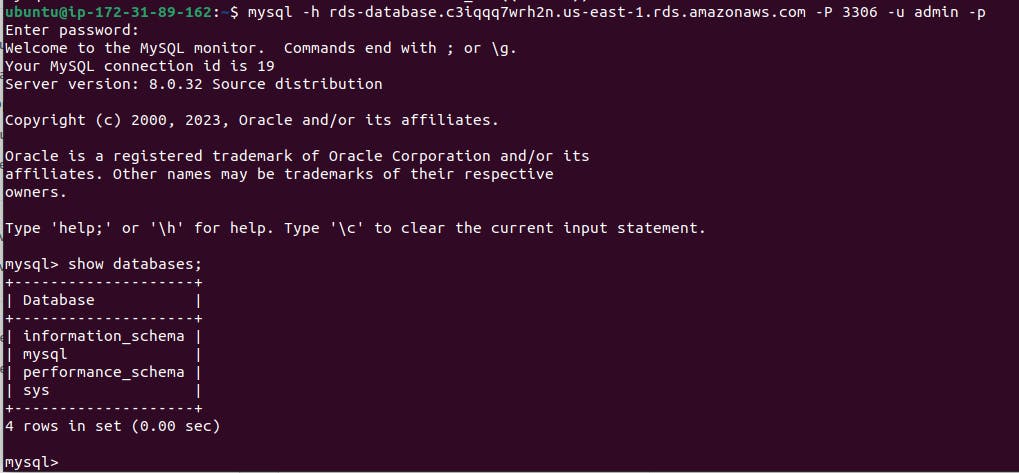
- Once the MySQL client is installed, you can connect to the RDS instance using the following command:
mysql -h <RDS endpoint> -P <port> -u <master username> -p
Thank you for reading. I hope you were able to understand and learn something new from my blog.
Happy Learning!
Please follow me on Hashnode and do connect with me on LinkedIn ArnavSingh.