

Table of contents
- What is AWS S3?
- Key Features of AWS S3
- Use Cases for AWS S3
- commonly used AWS CLI commands for Amazon S3:
- Task-01
- Launch an EC2 instance using the AWS Management Console and connect to it using Secure Shell (SSH).
- Create an S3 bucket and upload a file to it using the AWS Management Console.
- Access the file from the EC2 instance using the AWS Command Line Interface (AWS CLI).
- Task-02
![]()
Introduction: In today's digital age, the need for efficient and reliable storage solutions is ever-growing. One such solution that has revolutionized the way we store and manage data is Amazon Web Services (AWS) Simple Storage Service (S3). In this blog post, we will dive into the world of AWS S3, exploring its features, benefits, and use cases, all explained in simple language. So, let's get started!
What is AWS S3?
AWS S3, or Amazon Simple Storage Service, is like a massive online storage warehouse provided by Amazon Web Services. Instead of storing your files and data on your computer's hard drive, you can securely store them on the internet. It's like having a virtual storage space accessible from anywhere. AWS S3 is flexible and can store any type of data, like documents, images, videos, or website backups. It ensures your data's safety by automatically storing multiple copies across different servers. You can start small and easily expand your storage as needed. With AWS S3, you can organize your data in buckets and folders for easy management. You can control who can access your files and even track changes over time. It integrates smoothly with other services and applications, allowing you to host websites, deliver files faster, or store backups. AWS S3 simplifies storage by eliminating the need for physical hardware and providing a reliable and scalable solution for your data storage needs.
Key Features of AWS S3
Scalability: AWS S3 can handle small to large amounts of data, growing with your needs.
Durability: Your data is protected against hardware failures and automatically replicated across different servers and data centers.
Data Availability: You can access your data anytime, from anywhere, ensuring its availability when you need it.
Versioning: AWS S3 allows you to keep track of changes made to your files over time, making it easy to revert to previous versions if needed.
Security: You can set access policies, encryption, and authentication measures to control who can access and modify your data.
Simple Storage Structure: AWS S3 organizes data into buckets, folders, and objects, making it easy to manage and retrieve files.
Integration with Other Services: AWS S3 seamlessly integrates with other AWS services, enabling features like static website hosting, content delivery networks (CDNs), and database backups.
Cost-effective: AWS S3 offers cost-effective storage options, allowing you to choose the most suitable storage class for your data and providing cost-estimation tools.
Performance Optimization: You can optimize performance by configuring features like caching, compression, and data transfer acceleration.
Global Accessibility: AWS S3 is available in multiple regions worldwide, ensuring fast and reliable access to your data from different geographical locations.
Use Cases for AWS S3
Media Storage: AWS S3 can securely store media files like images, videos, and audio files, making it easy to access and distribute them across different platforms.
Data Backup and Recovery: It serves as a reliable backup solution, allowing businesses to store and restore data in case of accidental deletions, system failures, or disasters.
Content Distribution: AWS S3 integrates with content delivery networks (CDNs) to efficiently deliver static content like images, videos, and documents to users worldwide, improving performance and reducing latency.
Data Archiving: S3 Glacier, a storage class within AWS S3, offers long-term data archiving with low costs. It's ideal for storing infrequently accessed data that needs to be retained for compliance or historical purposes.
Website Hosting: AWS S3 can host static websites, making it easy to publish and serve HTML, CSS, JavaScript, and media files without the need for managing complex web servers.
commonly used AWS CLI commands for Amazon S3:
aws s3 ls - This command lists all of the S3 buckets in your AWS account.
aws s3 mb s3://bucket-name - This command creates a new S3 bucket with the specified name.
aws s3 rb s3://bucket-name - This command deletes the specified S3 bucket.
aws s3 cp file.txt s3://bucket-name - This command uploads a file to an S3 bucket.
aws s3 cp s3://bucket-name/file.txt . - This command downloads a file from an S3 bucket to your local file system.
aws s3 sync local-folder s3://bucket-name - This command syncs the contents of a local folder with an S3 bucket.
aws s3 ls s3://bucket-name - This command lists the objects in an S3 bucket.
aws s3 rm s3://bucket-name/file.txt - This command deletes an object from an S3 bucket.
aws s3 presign s3://bucket-name/file.txt - This command generates a pre-signed URL for an S3 object, which can be used to grant temporary access to the object.
aws s3api list-buckets - This command retrieves a list of all S3 buckets in your AWS account, using the S3 API.
Task-01
Launch an EC2 instance using the AWS Management Console and connect to it using Secure Shell (SSH).
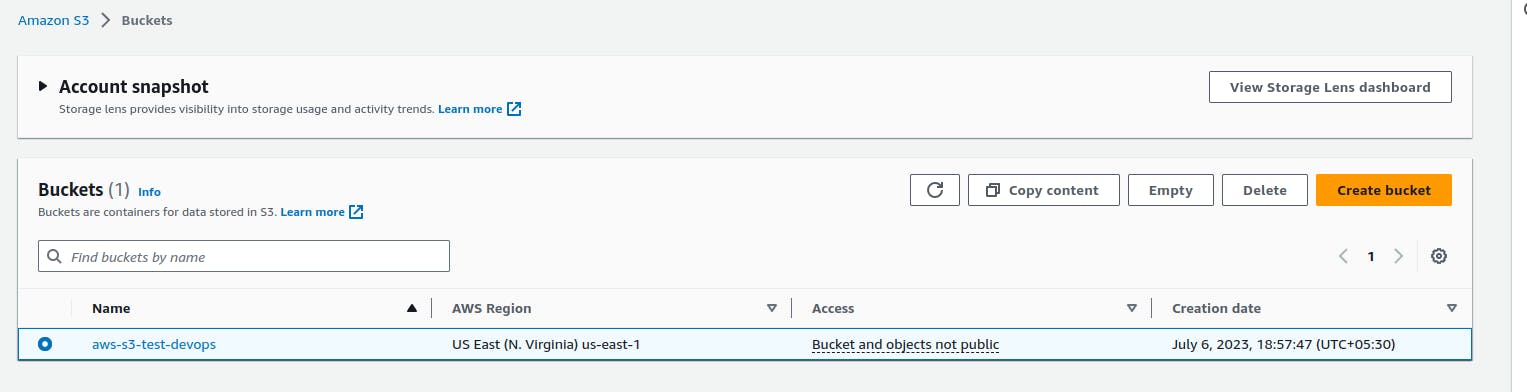
Create an S3 bucket and upload a file to it using the AWS Management Console.
A step-by-step guide to creating an S3 bucket and uploading a file to it using the AWS Management Console:
Open the AWS Management Console in your web browser and sign in to your AWS account.
Navigate to the S3 service by searching for "S3" in the AWS services search bar and selecting "S3" from the results.
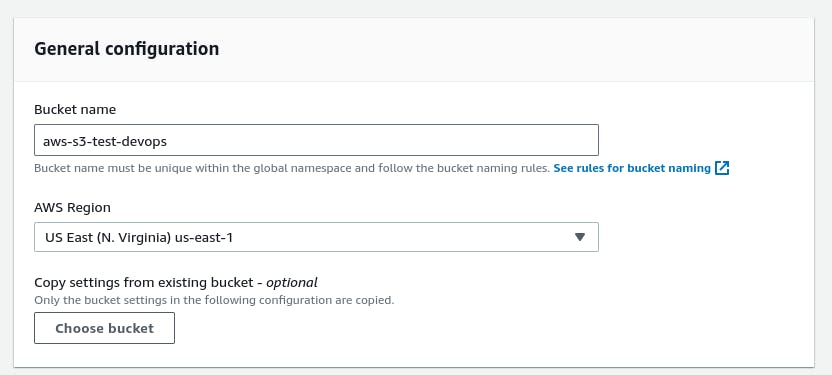
Click on the "Create bucket" button to start the bucket creation process.

- Provide a unique and meaningful name for your bucket. Note that bucket names must be globally unique across all of AWS. You can also choose the AWS Region where you want your bucket to be located. "Scroll Down."
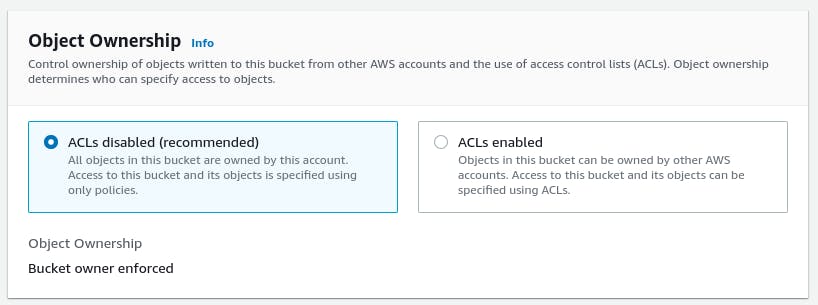
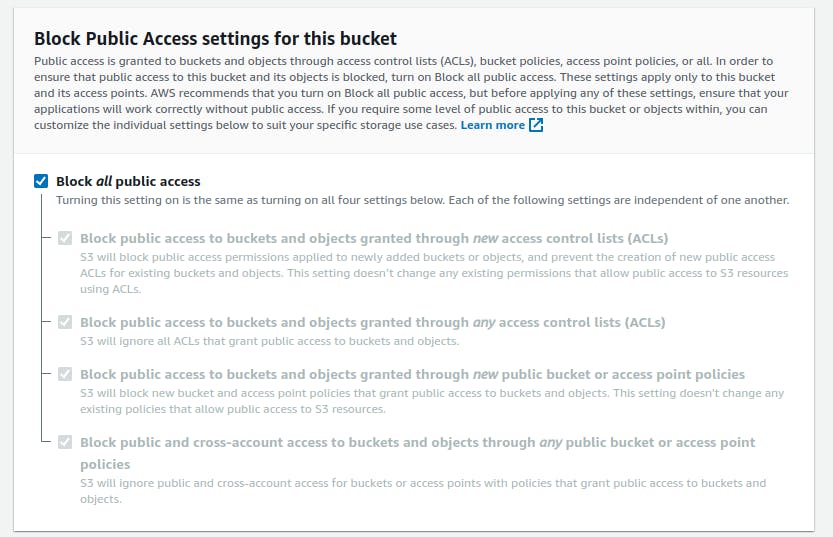
- Set up an optional configuration for the bucket permissions. You can manage access control lists (ACLs) and bucket policies to define who can access the bucket and what they can do with the objects in it. Again, you can leave the default settings or customize them as needed. "Scroll Down."
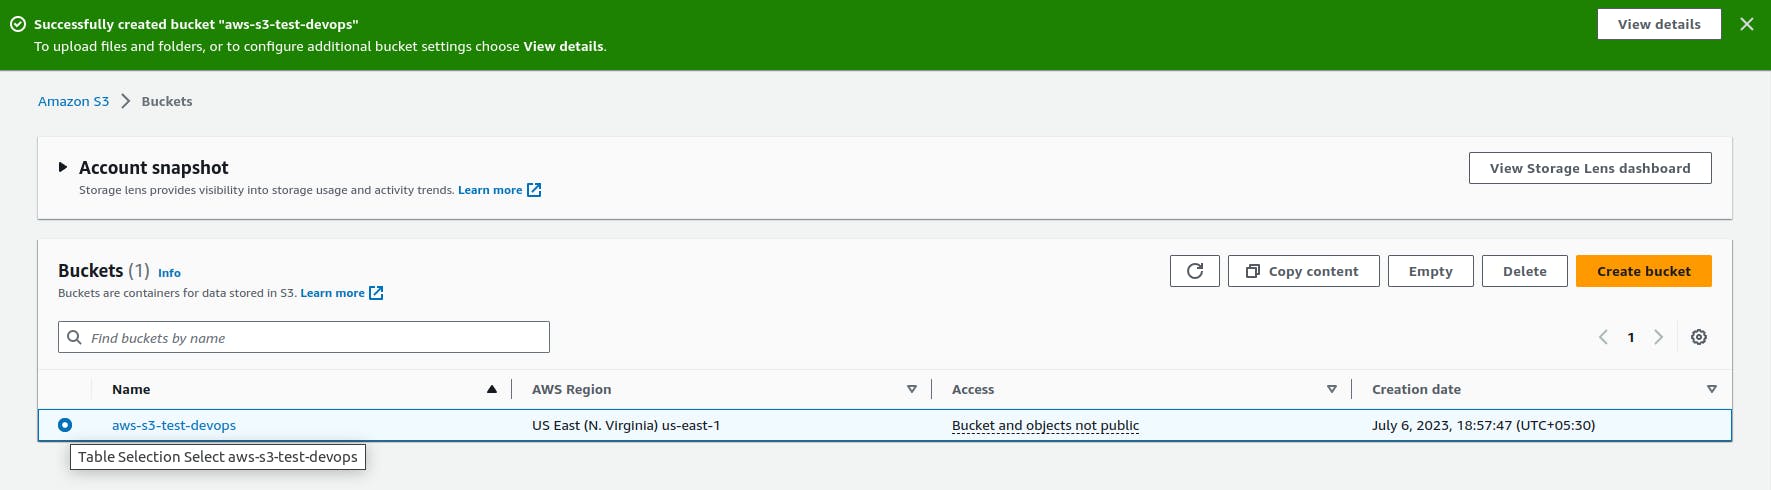
Review the bucket configuration and click "Create bucket" to create the bucket.
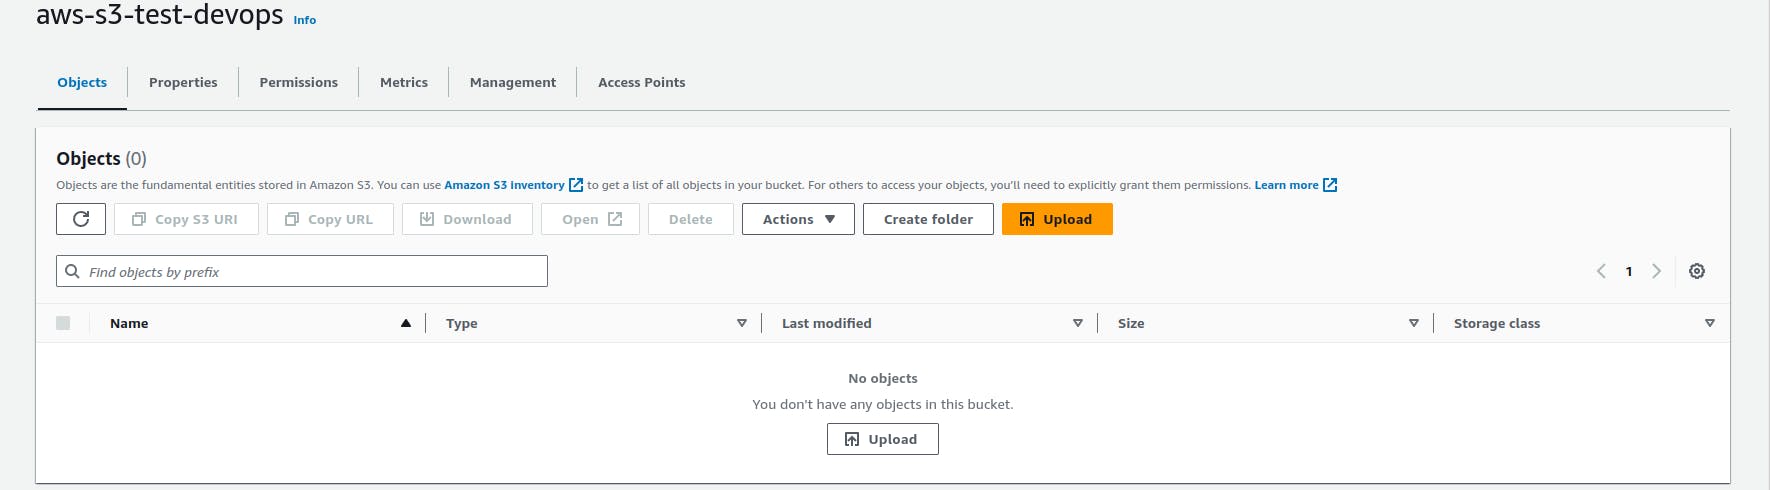
Once the bucket is created, you will be redirected to the bucket overview page. Click on the bucket name to open the bucket.
- To upload a file to the bucket, click the "Upload" button.
- In the upload window, click the "Add files" button or drag and drop files from your computer to the upload area. You can upload one or multiple files at once.
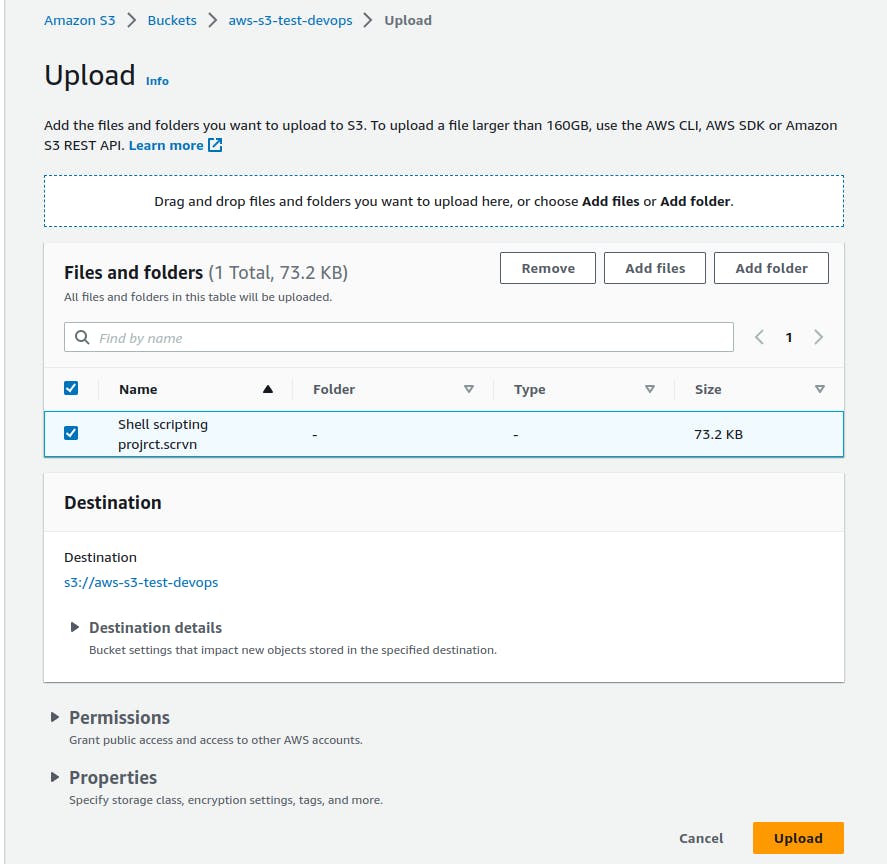
Optionally, you can set permissions, configure metadata, and enable server-side encryption for the uploaded files. You can leave these settings as default if you don't need to customize them.
Click the "Upload" button to start the file upload process. Progress bars will show the upload status of each file.
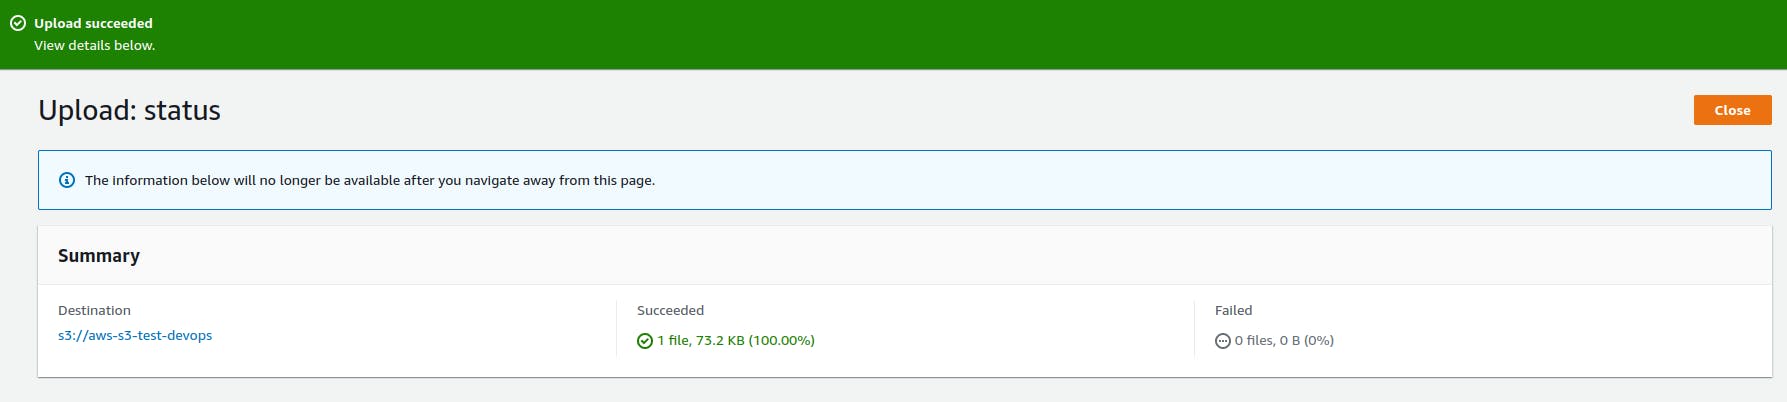
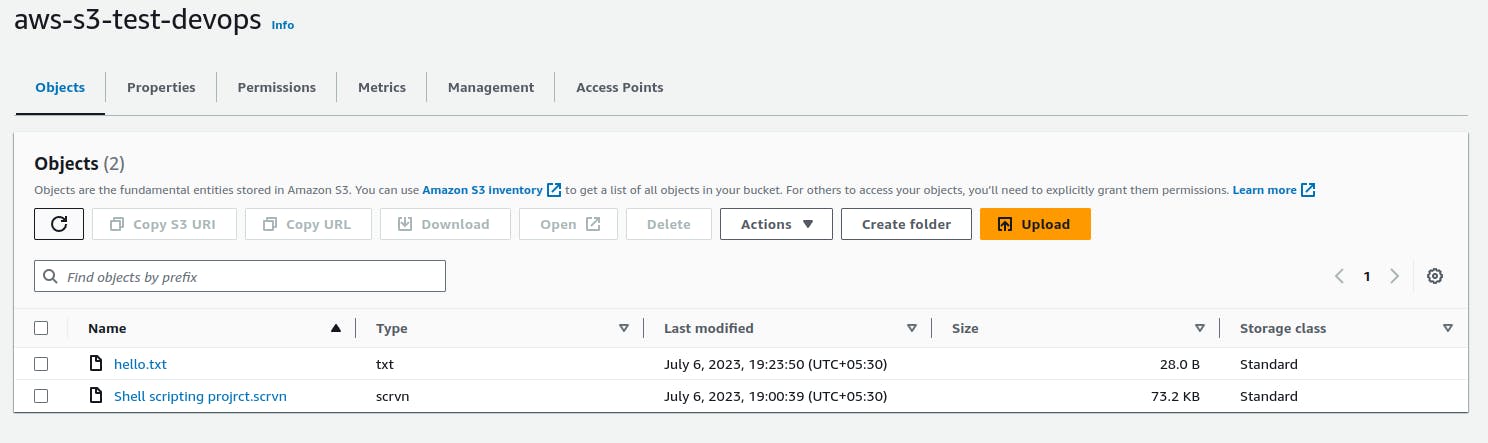
- Once the upload is complete, you will see the uploaded files listed in your S3 bucket.
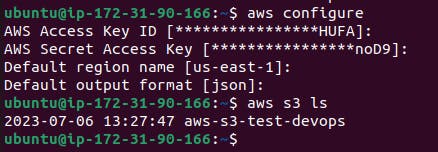
Access the file from the EC2 instance using the AWS Command Line Interface (AWS CLI).
Once the AWS CLI is configured, you can use the following command to verify.
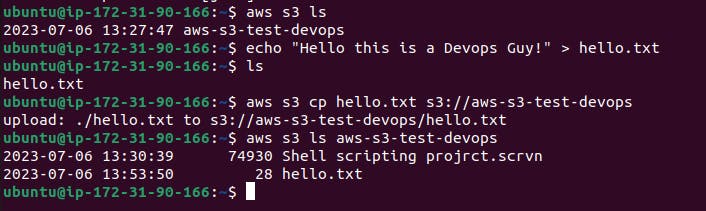
aws s3 ls
Use the aws s2 cp command to copy files from your EC2 instance to your S3 bucket.
aws s3 cp <file-name> s3://<bucket-name>
Task-02
Create a snapshot of the EC2 instance and use it to launch a new EC2 instance.
Download a file from the S3 bucket using the AWS CLI.
Verify that the contents of the file are the same on both EC2 instances.
Steps:-
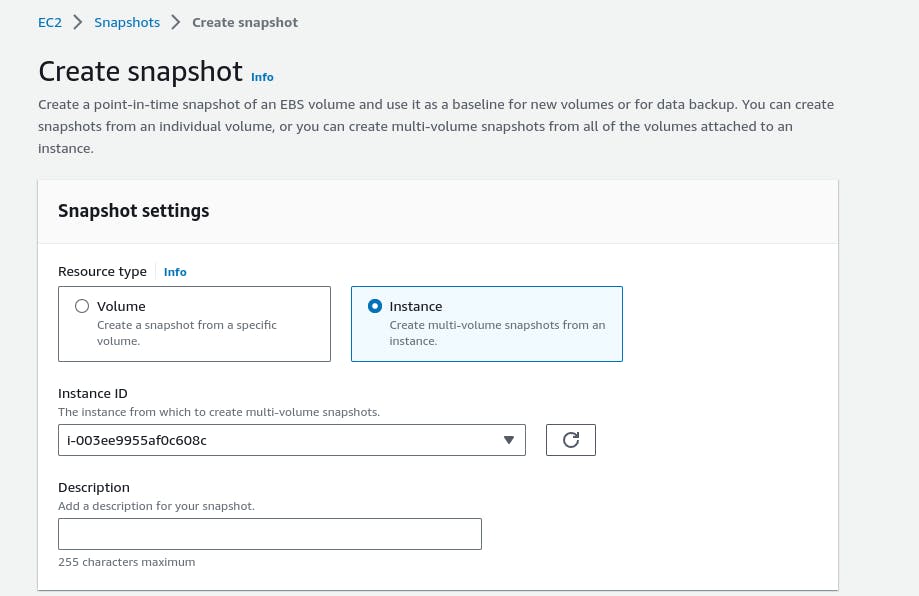
In the EC2 dashboard, select "Snapshots" from the left-hand navigation pane.
Click Snapshots -> Create snapshot

- Need to select the instance and instance id and click on Create Snapshot.
- Wait for the snapshot creation process to complete. This may take some time depending on the size of the instance and the amount of data being snapshot.

- Once the snapshot is created, Locate and select the snapshot that was just created.

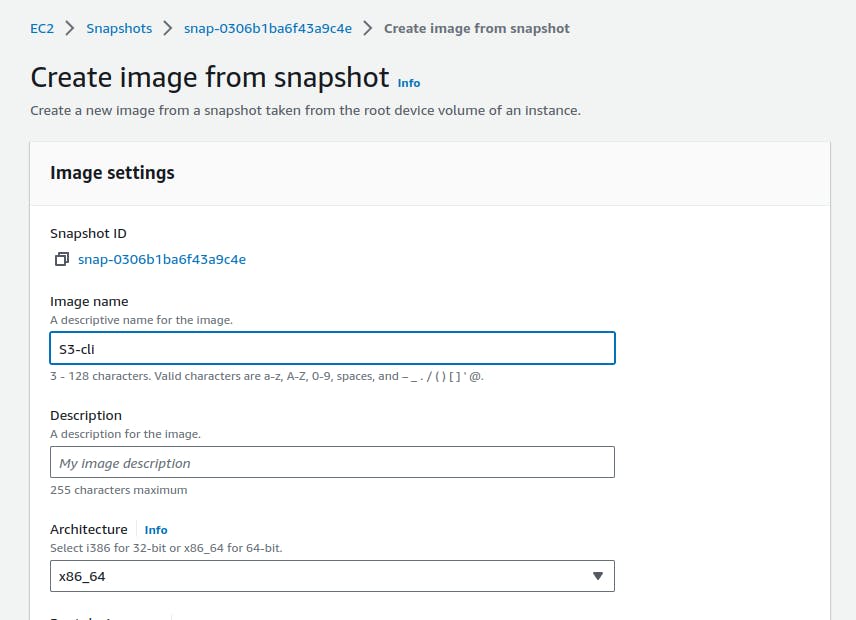
- Click on the "Actions" button above the snapshot list and choose "Create Image from snapshot" from the drop-down menu.

- In the "Create Image" dialog box, provide a unique name and description for the AMI. Optionally, you can specify other configuration settings such as instance type, security groups, and storage. Click "Create".
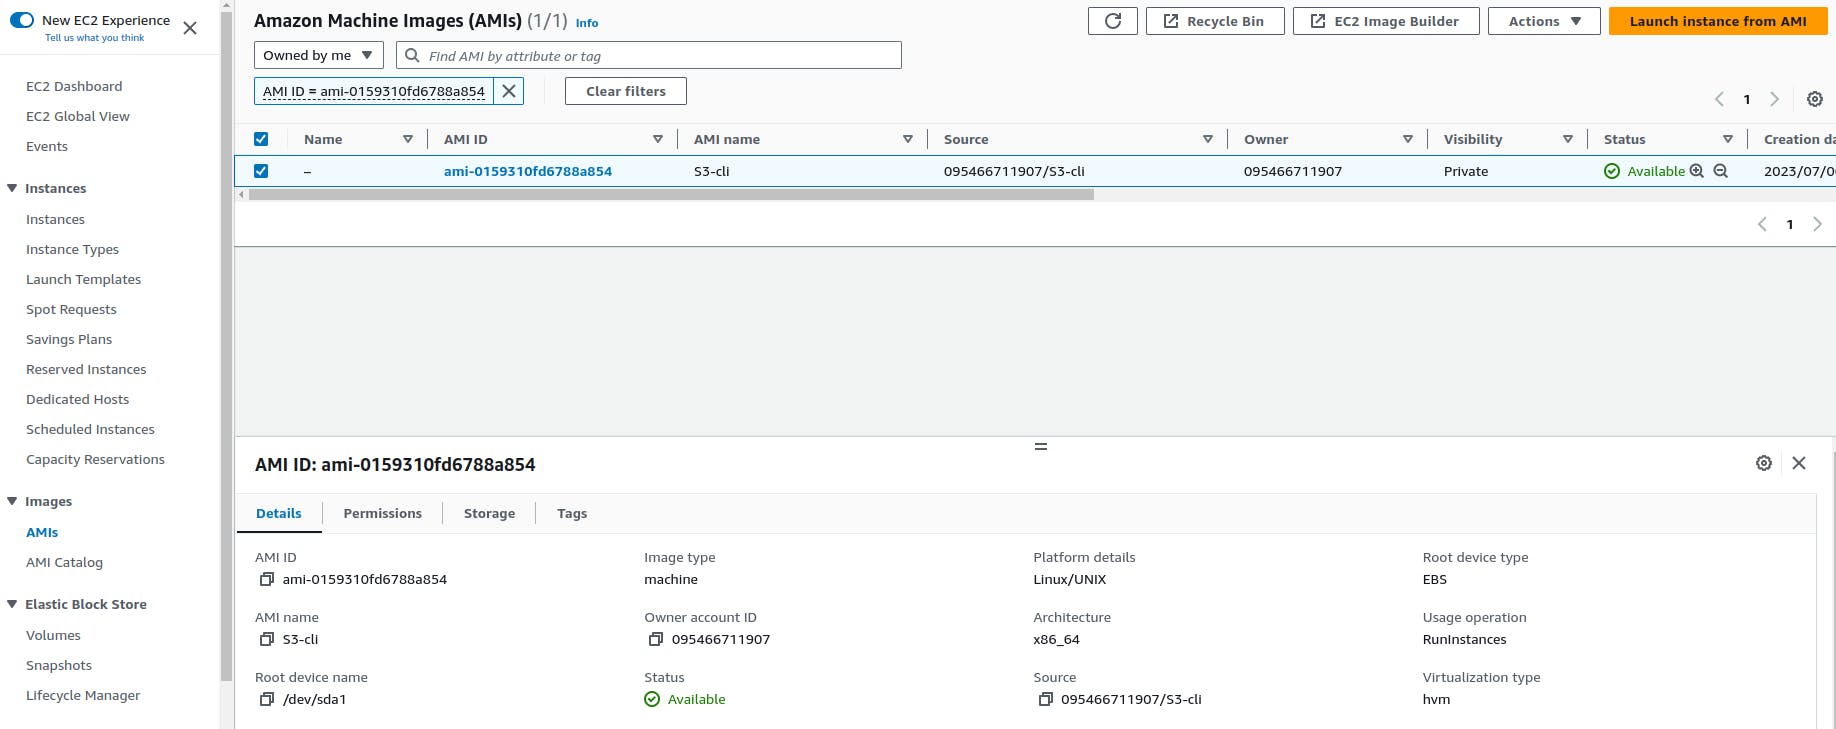
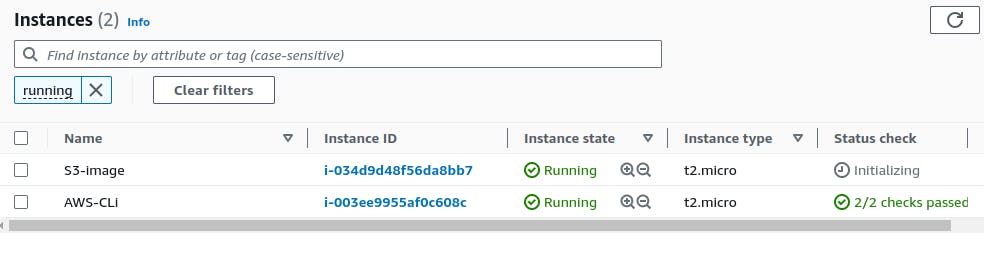
- Now click on launch instances from AMI.
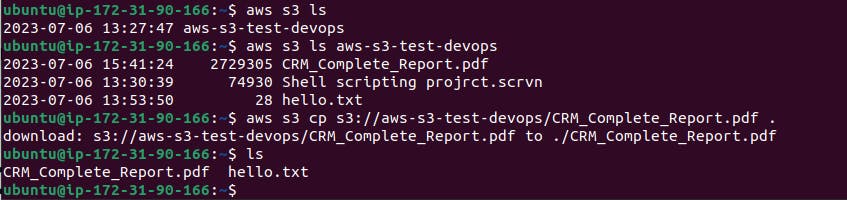
Download a file from the S3 bucket using the AWS CLI.
Use this command
<aws s3 cp s3://bucket-name/file.txt .> - This command downloads a file from an S3 bucket to your local file system.
- By following these steps, you will have created a snapshot of the original EC2 instance and used it to launch a new EC2 instance. The new instance will have the same configuration and data as the original instance at the time the snapshot was taken.
Thank you for reading. I hope you were able to understand and learn something new from my blog.
Happy Learning!
Please follow me on Hashnode and do connect with me on LinkedIn ArnavSingh.