

What is CodeDeploy?
AWS CodeDeploy is a service provided by Amazon Web Services (AWS) that automates the deployment of applications to a variety of computing services, such as Amazon EC2 instances, on-premises servers, AWS Fargate, and Lambda functions. It is a continuous deployment tool that makes it easier to release new features and updates to your application without manually managing the deployment process.
CodeDeploy allows you to define the deployment configurations and deploy your applications in a consistent and reliable manner, ensuring minimal downtime and reducing the risk of errors during the deployment process.
Read about Appspec.yaml file for CodeDeploy.
The appspec.yaml file is a YAML-formatted file used in AWS CodeDeploy to define the deployment and lifecycle hooks for your application. It provides instructions on how to deploy the application to different instances, how to manage files, and how to execute scripts during the deployment process.
Task-01 :
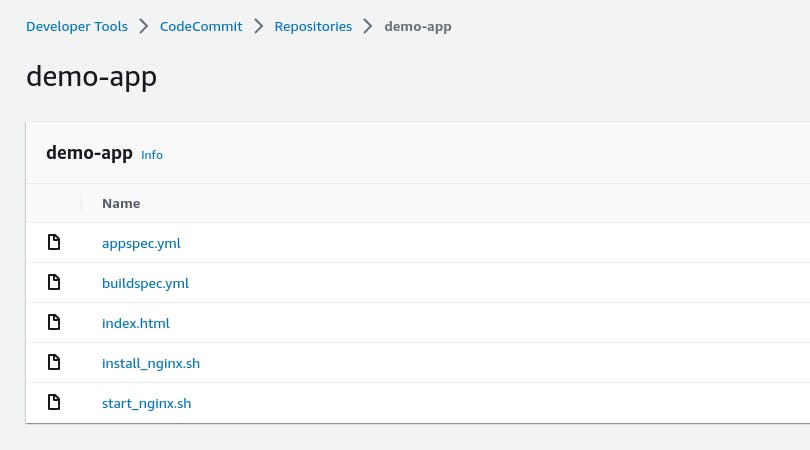
Deploy index.html file on EC2 machine using nginx
you have to set up a CodeDeploy agent in order to deploy code on EC2
Add appspec.yaml file to CodeCommit Repository and complete the deployment process.
Step1:-
Set Up an EC2 Instance:

Step2:-
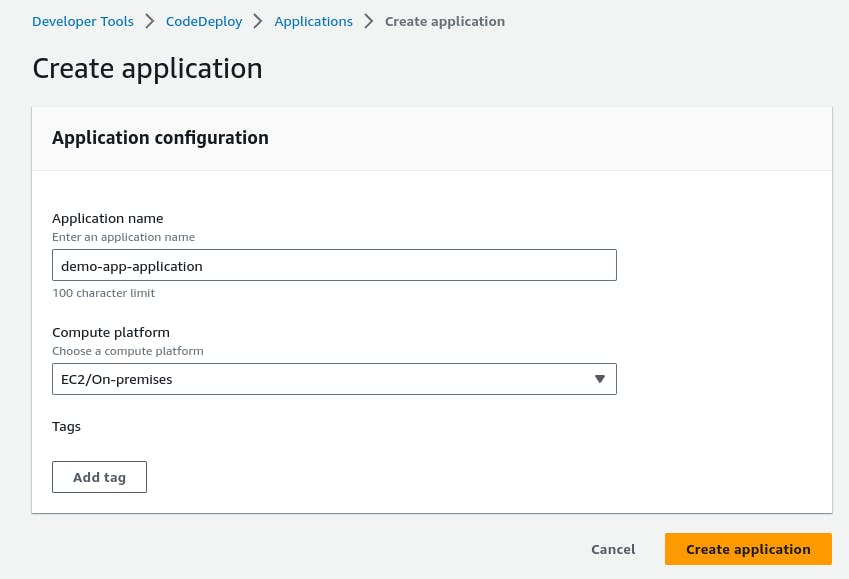
Create a CodeDeploy Application:
- Go to the AWS Management Console and navigate to the CodeDeploy service.
Click on "Create application" and give it the name "demo-app-application"
Choose the Compute platform as "EC2/On-Premises".

Step3:-
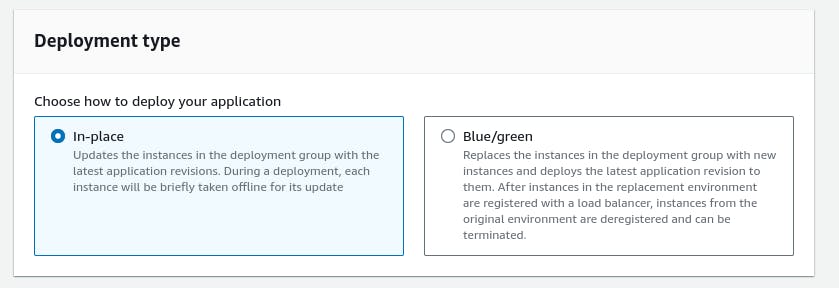
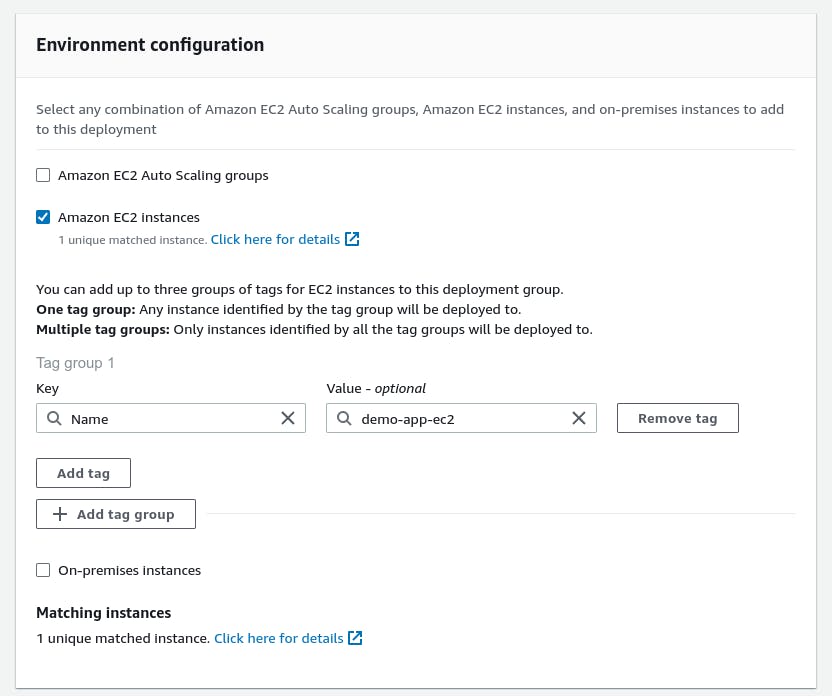
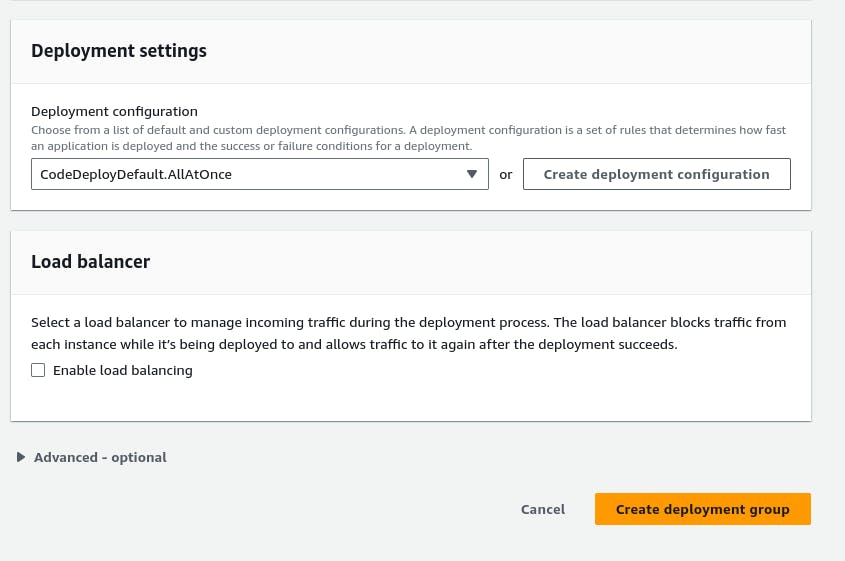
Create a Deployment Group:
In the CodeDeploy application you created, click on "Create deployment group".
Give the deployment group the name "demo-app-depl-grp".

- For the service role, select "Create a new service role".
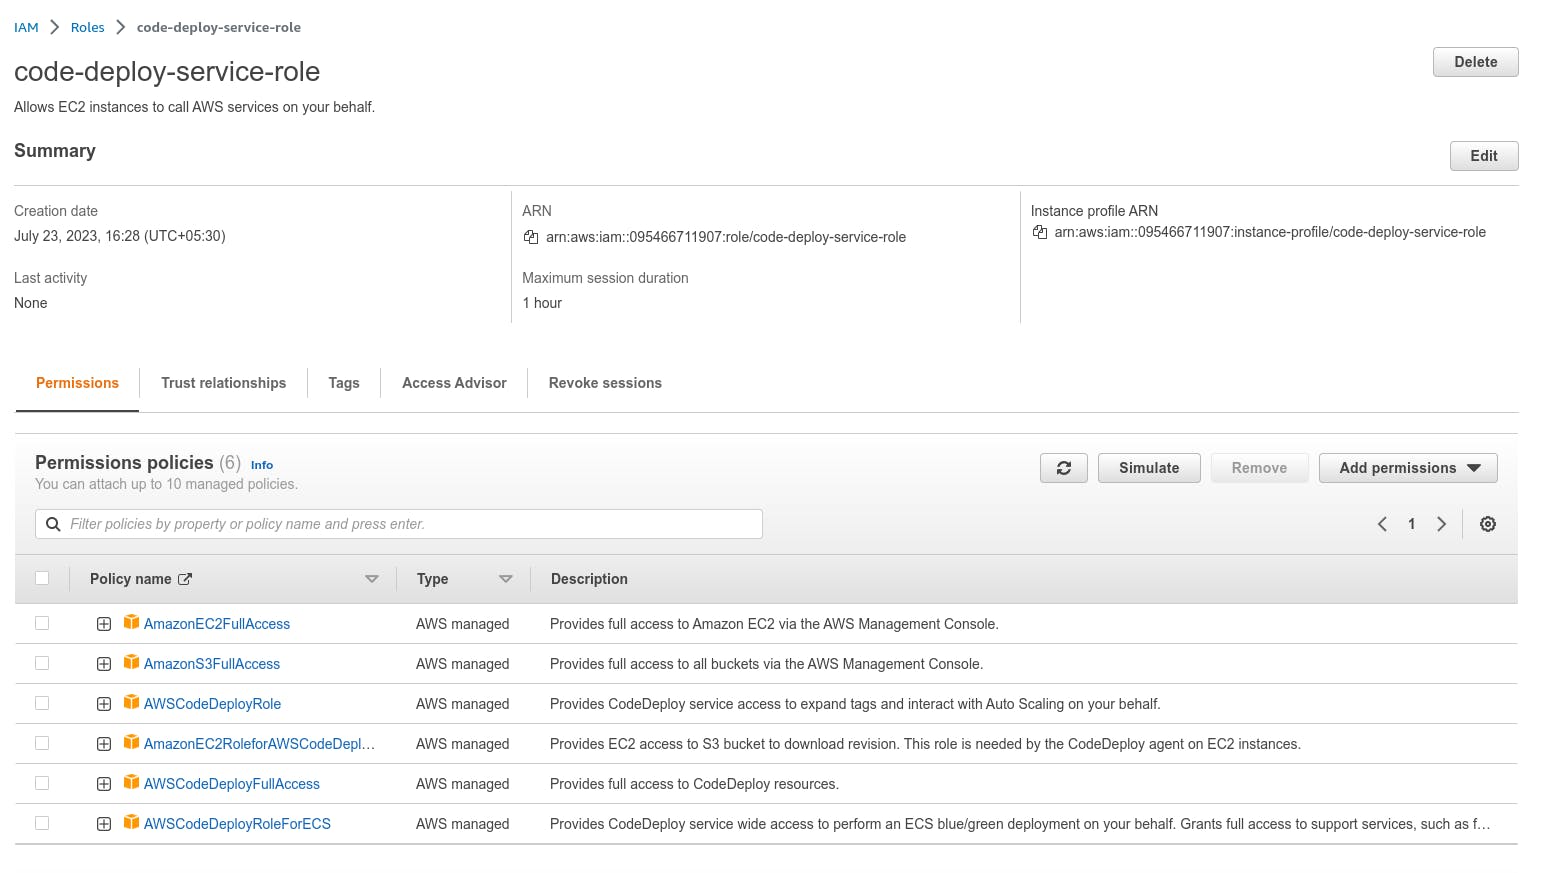
Update the Trust relationship in order to grant AWS CodeDeploy access to your target instances.
    {
        "Version": "2012-10-17",
        "Statement": [
            {
                "Effect": "Allow",
                "Principal": {
                    "Service": "codedeploy.amazonaws.com"
                },
                "Action": "sts:AssumeRole"
            }
        ]
    }
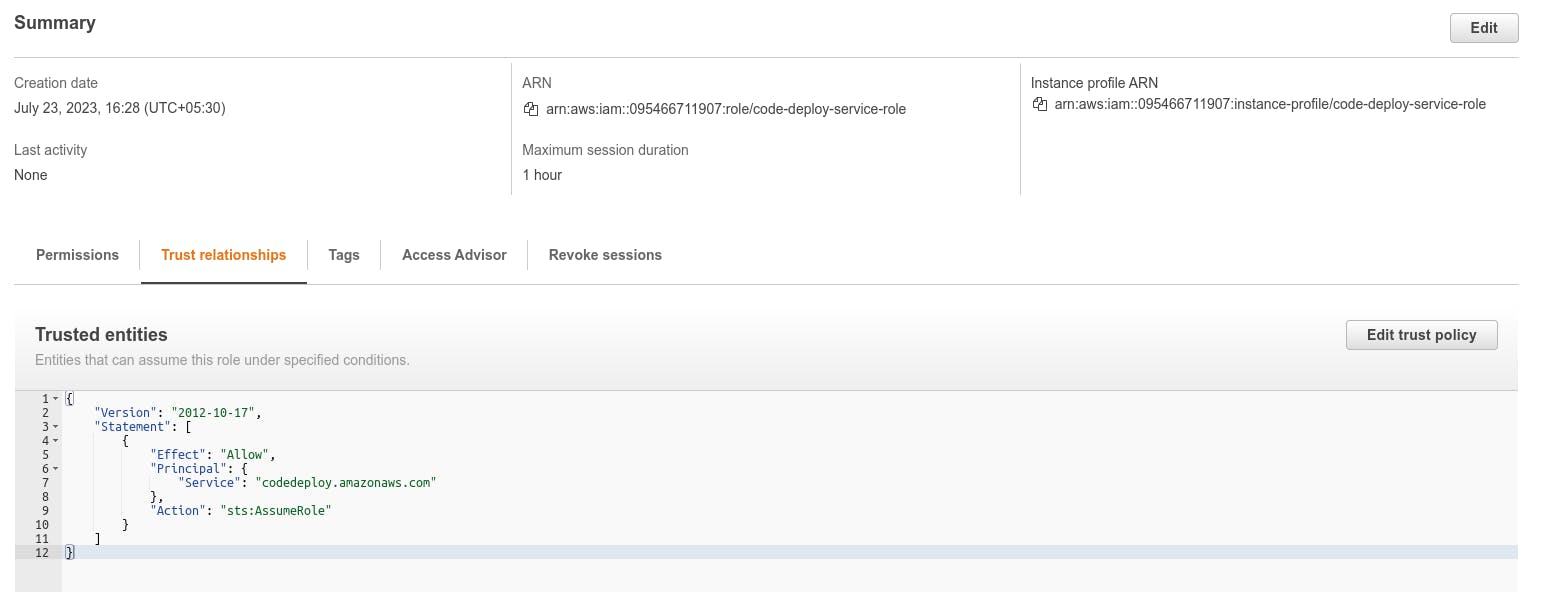
- Click on "Create deployment group".
Step4:-
Setup a CodeDeploy agent to deploy code on EC2
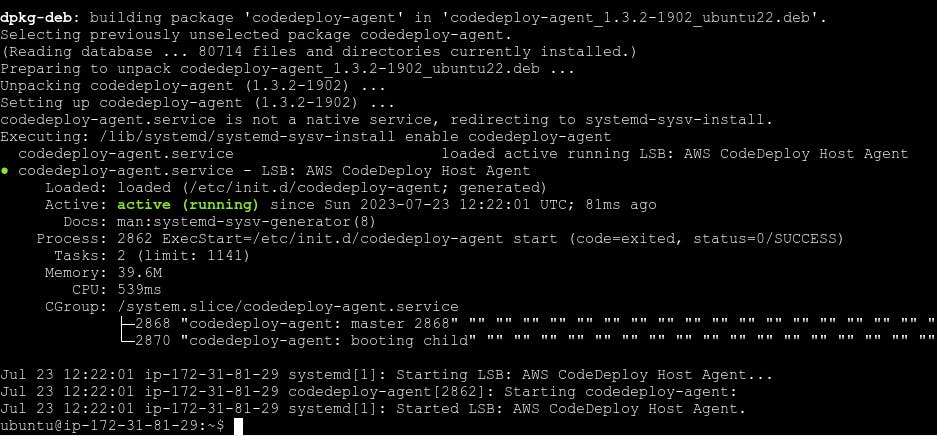
To use CodeDeploy on EC2 instances or on-premises servers, the CodeDeploy agent must be installed first.
Follow the steps in the AWS documentation to install the CodeDeploy agent on your EC2 instance: docs.aws.amazon.com/codedeploy/latest/userg..
OR
You can install the CodeDeploy agent by running the following script on your EC2 instance:
        #!/bin/bash
        # This installs the CodeDeploy agent and its prerequisites on Ubuntu 22.04.
        sudo apt-get update
        sudo apt-get install ruby-full ruby-webrick wget -y
        cd /tmp
        wget https://aws-codedeploy-us-east-1.s3.us-east-1.amazonaws.com/releases/codedeploy-agent_1.3.2-1902_all.deb
        mkdir codedeploy-agent_1.3.2-1902_ubuntu22
        dpkg-deb -R codedeploy-agent_1.3.2-1902_all.deb codedeploy-agent_1.3.2-1902_ubuntu22
        sed 's/Depends:.*/Depends:ruby3.0/' -i ./codedeploy-agent_1.3.2-1902_ubuntu22/DEBIAN/control
        dpkg-deb -b codedeploy-agent_1.3.2-1902_ubuntu22/
        sudo dpkg -i codedeploy-agent_1.3.2-1902_ubuntu22.deb
        systemctl list-units --type=service | grep codedeploy
        sudo service codedeploy-agent status
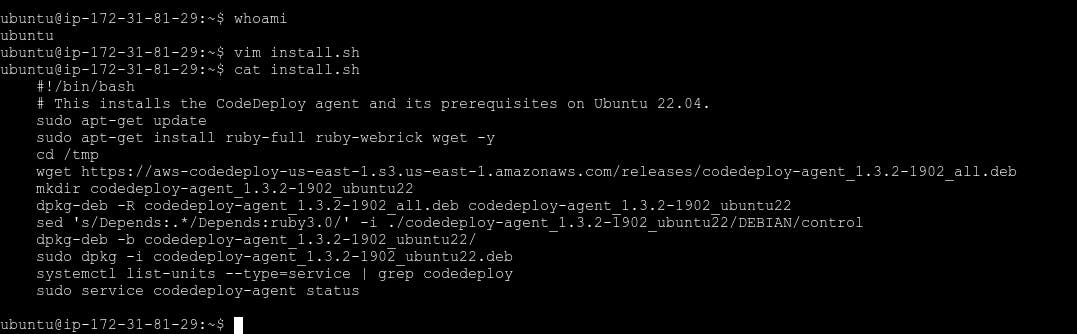
- Install the install.sh script with "sudo bash install.sh"
Step5:-
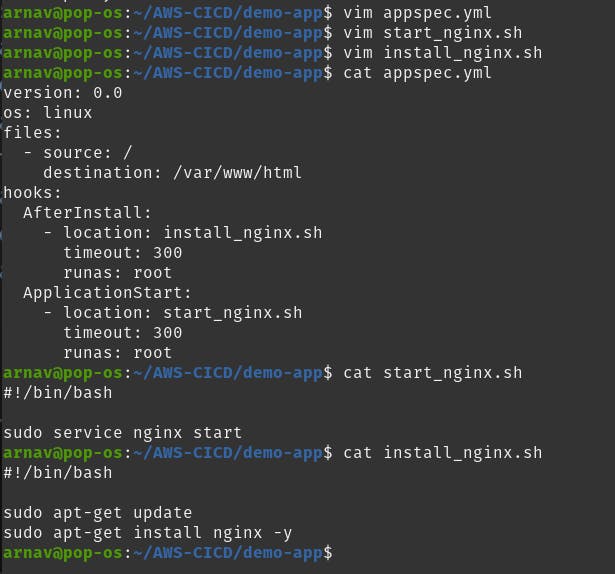
To add the
appspec.yamlfile to the CodeCommit repository and complete the deployment process with AWS CodeDeploy, follow these steps:Create the
appspec.yamlFile:Create a file named
appspec.yamland add the deployment details, hooks, and files to be deployed.This is a appspec.yml file that deploys the index.html file on nginx. also, create 2 scripts for installing nginx and starting nginx.
      version: 0.0
      os: linux
      files:
        - source: /
          destination: /var/www/html
      hooks:
        AfterInstall:
          - location: install_nginx.sh
            timeout: 300
            runas: root
        ApplicationStart:
          - location: start_nginx.sh
            timeout: 300
            runas: root
#!/bin/bash
sudo service nginx start
#!/bin/bash
sudo apt-get update
sudo apt-get install nginx -yapp
Step6:-
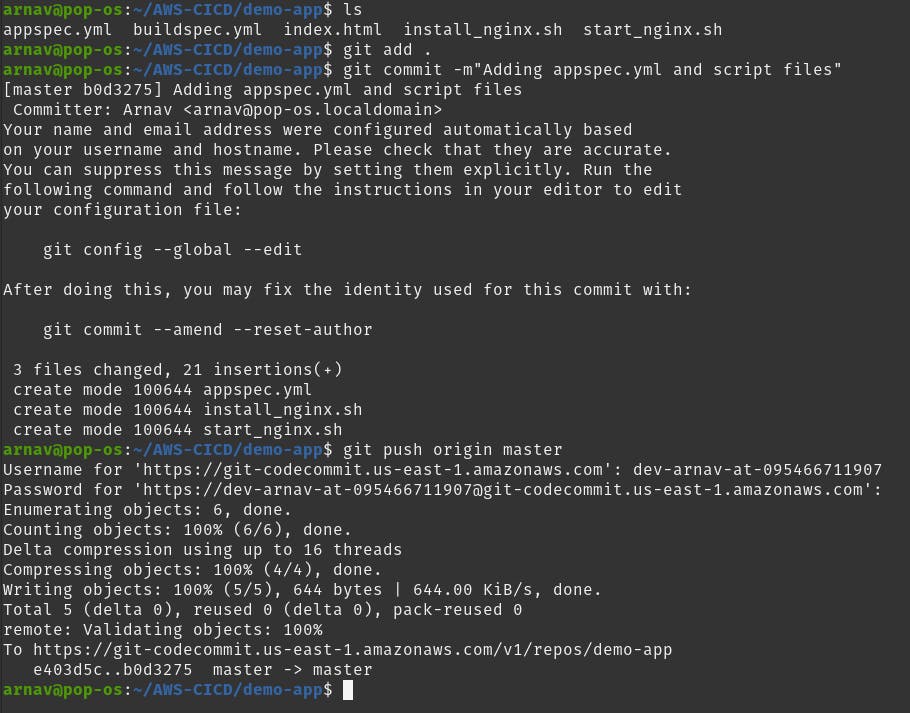
Add
appspec.yamlto CodeCommit Repository:Commit the
appspec.yaml, scripts and other files to the CodeCommit repository with a meaningful commit message.
Add changes to the buildspec.yml file
    From this
    artifacts:
        files:
          - /var/www/html/index.html
    to this
    artifacts:
        files:
          - '**/*'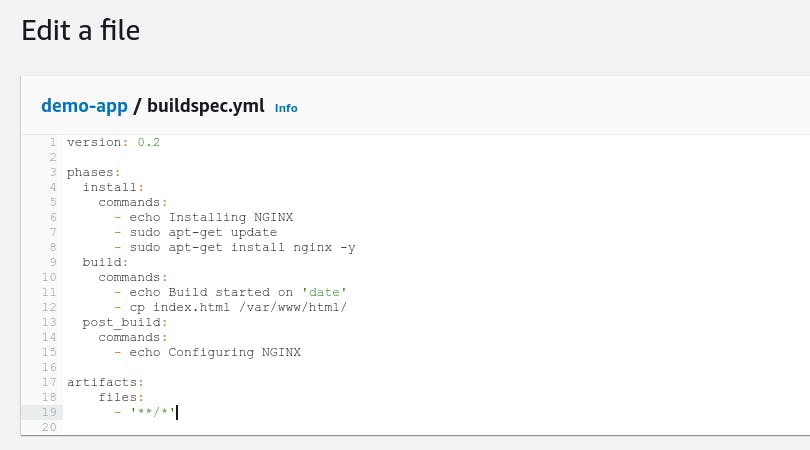
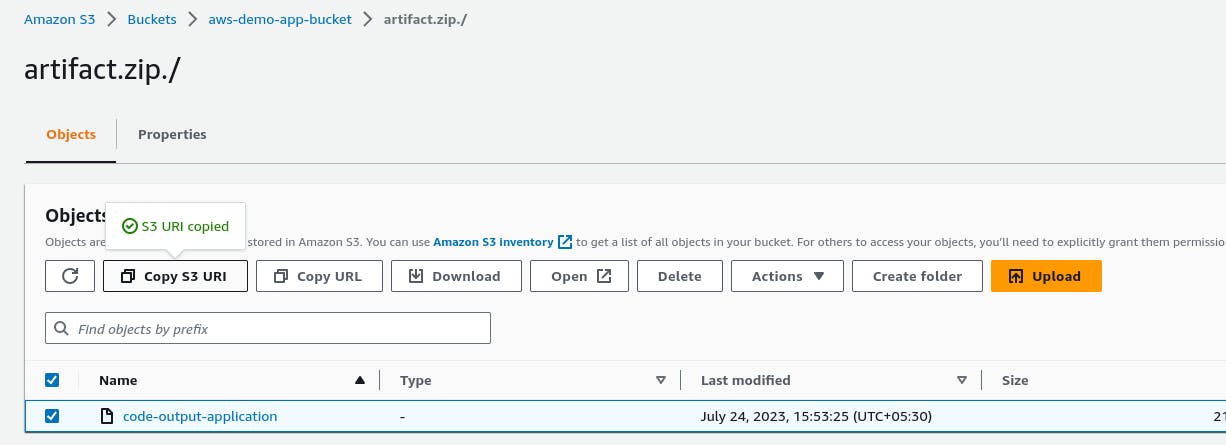
Now click on start build on Developer Tools->CodeBuild->Build projects->demo-app-build

After building completion, go to the S3 bucket and copy the S3 URL of the artifact.zip file
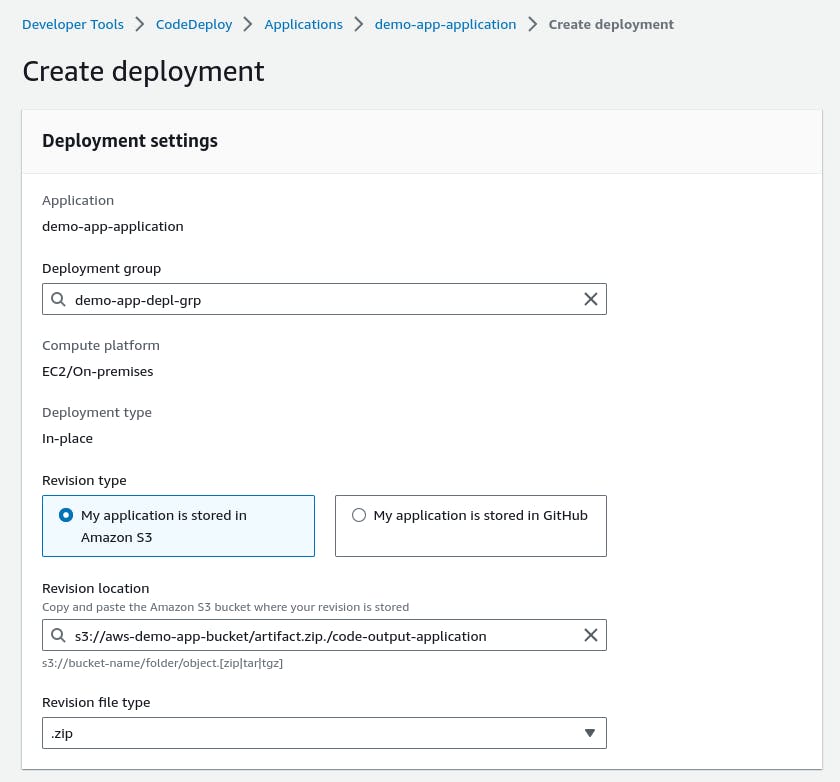
Step7:-
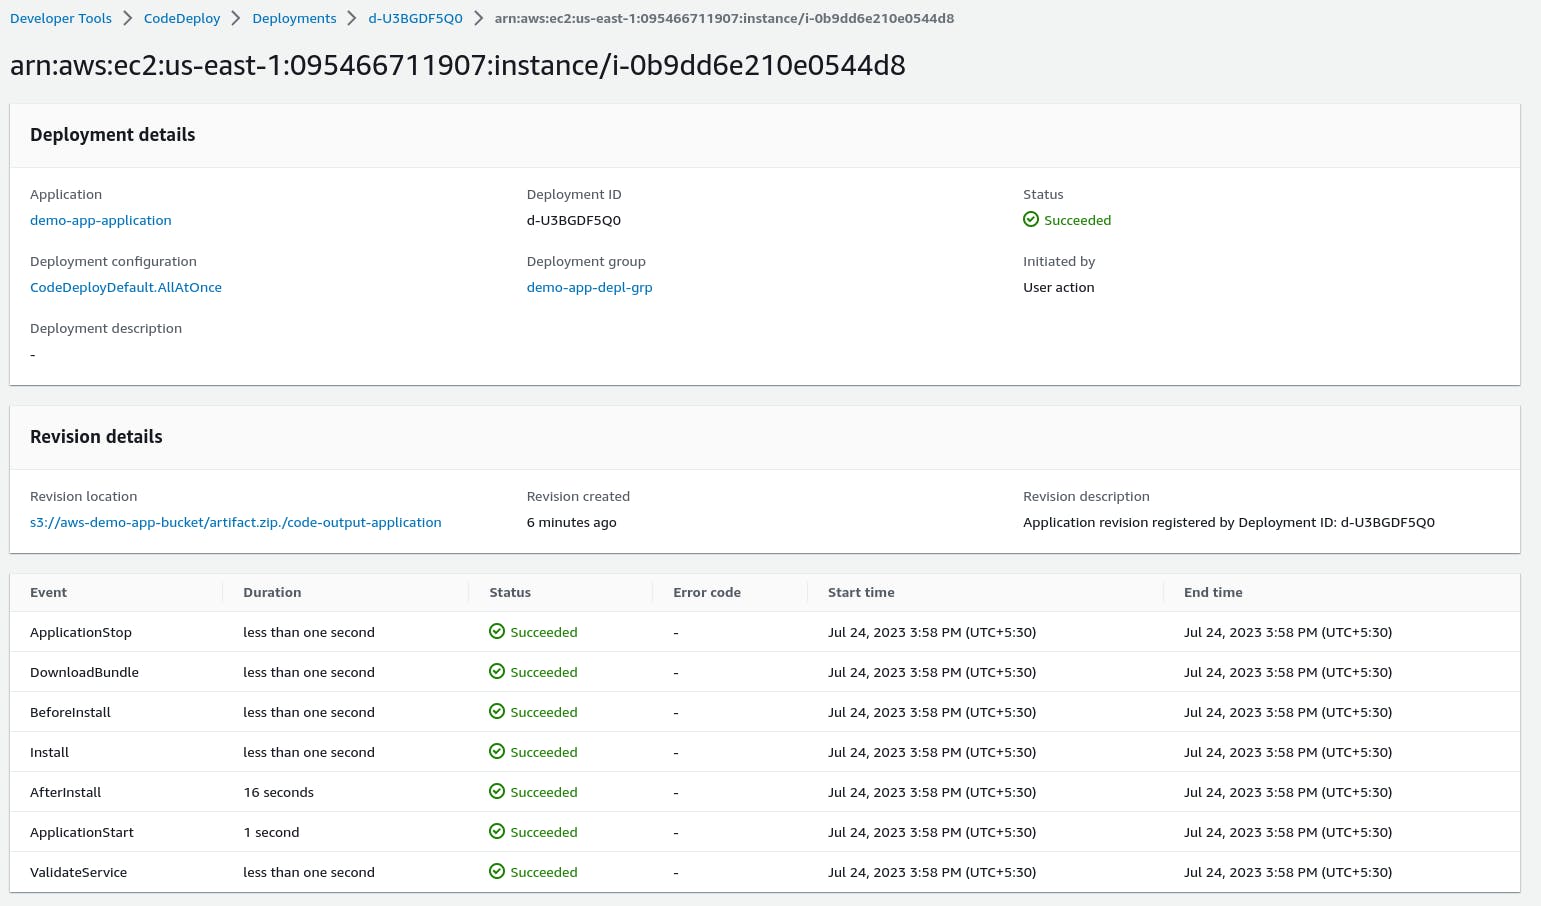
- Create a Deployment:
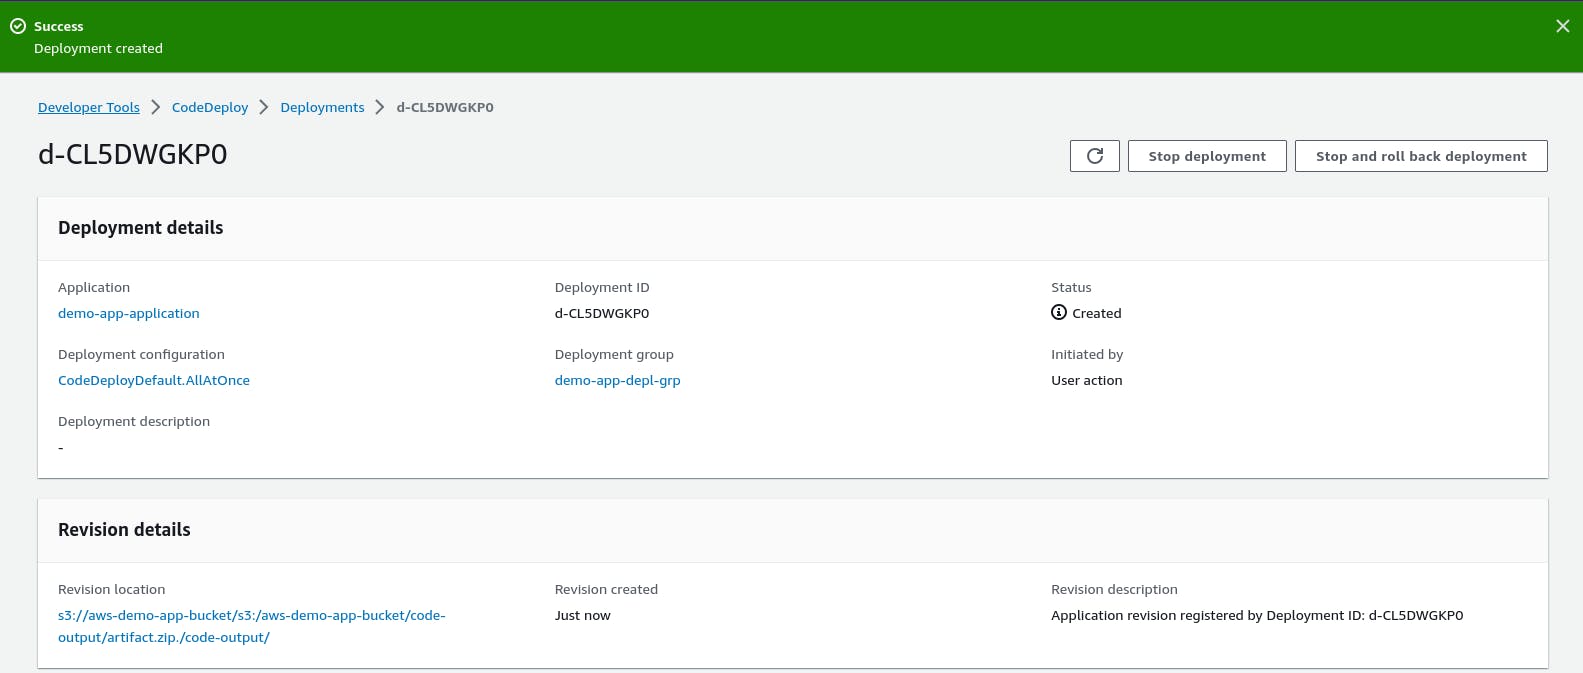
- After deployment is created but events are still in a pending state.
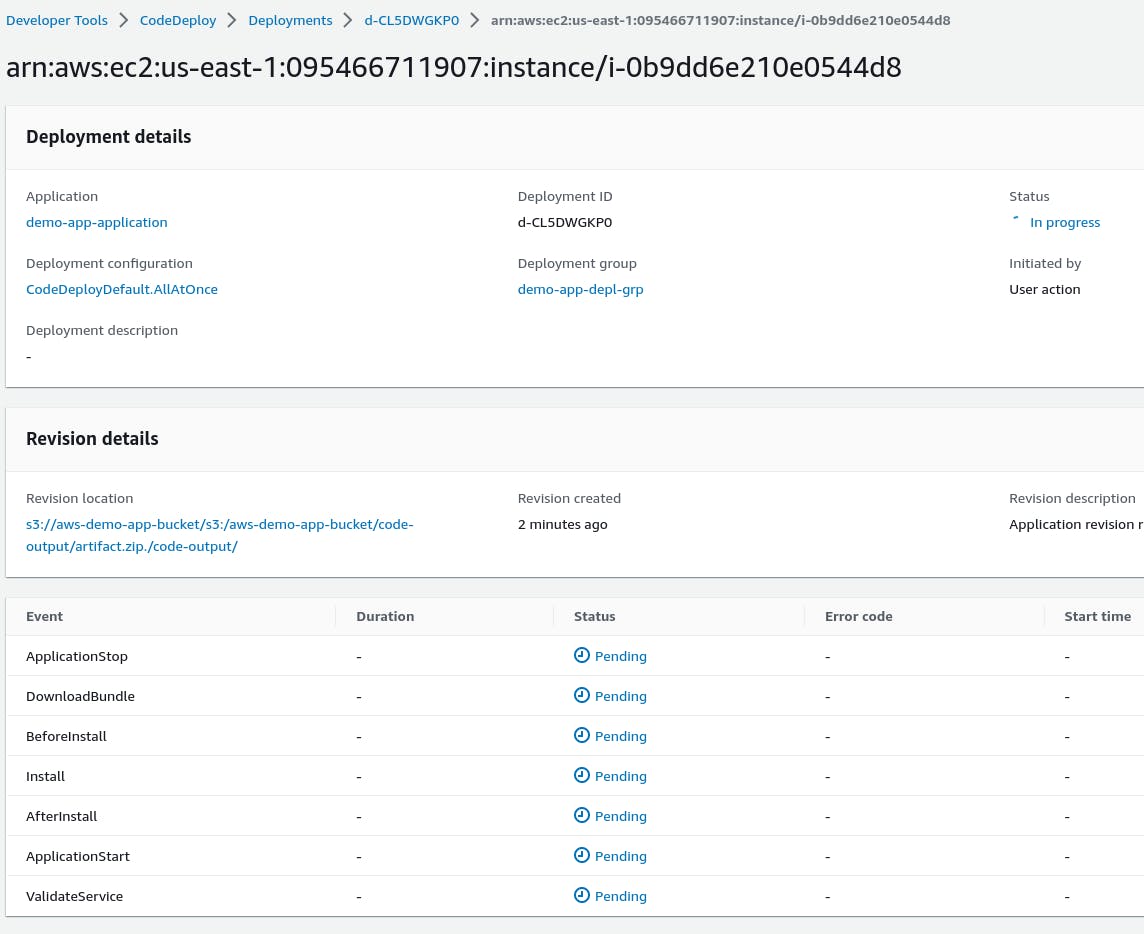
The reason is EC2 doesn't have any role policy to retrieve the data from S3 to CodeDeploy.
To create a new service role for enabling communication between EC2 and S3, code deploy.
Go to the IAM service and create 'EC2-S3-CodeDeploy' with permissions.
"AmazoneEC2FullAccess", "AmazoneS3FullAccess", "AWSCodeDeployFullAccess".
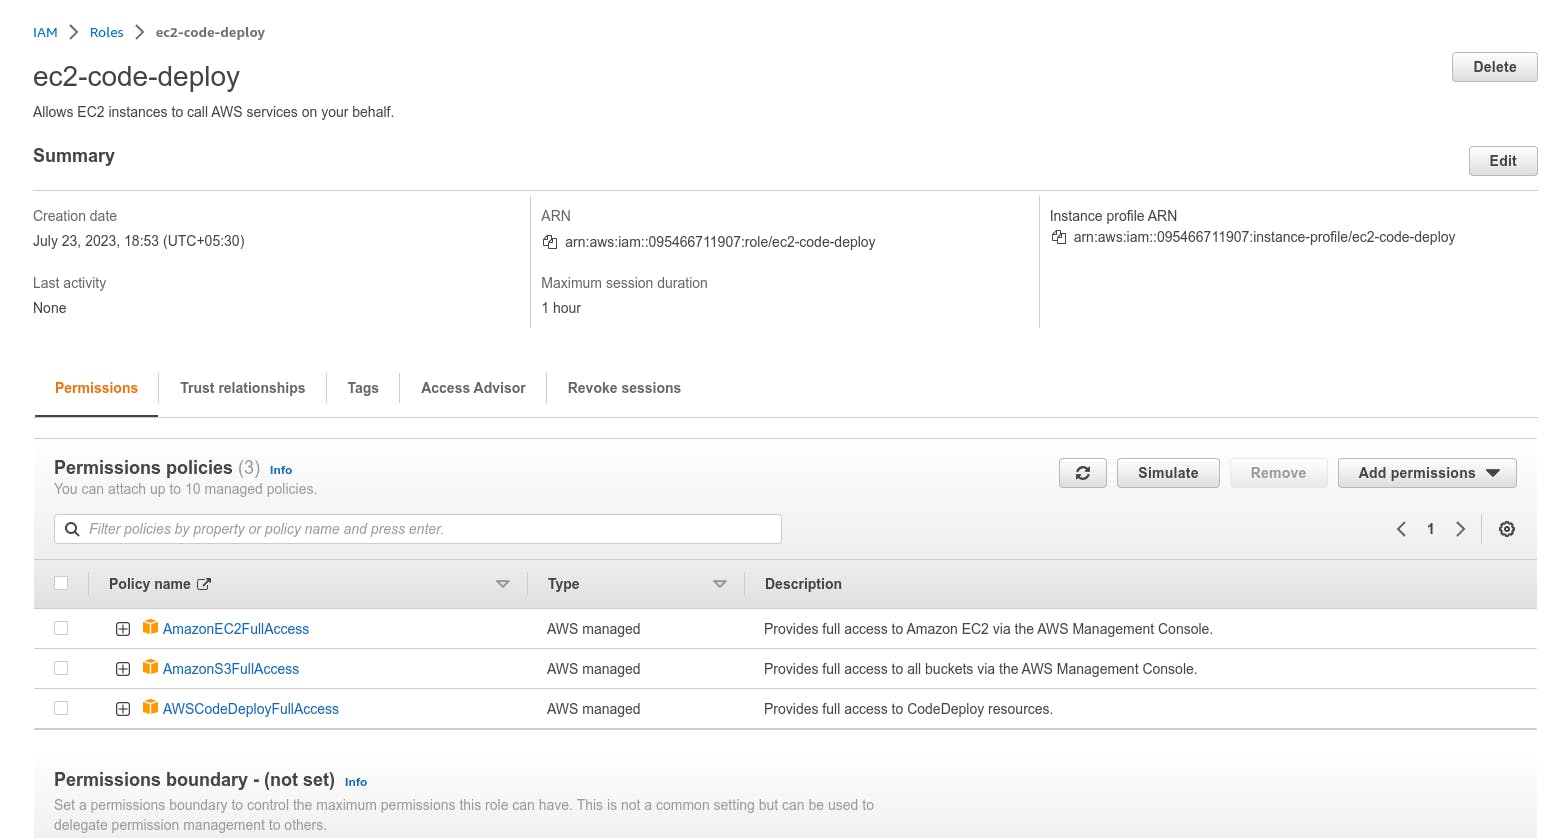
- Now attach the role to EC2 Instance.

After updating the IAM role, restart the code-deploy agent.
  sudo service codedeploy-agent restart
  sudo service codedeploy-agent status
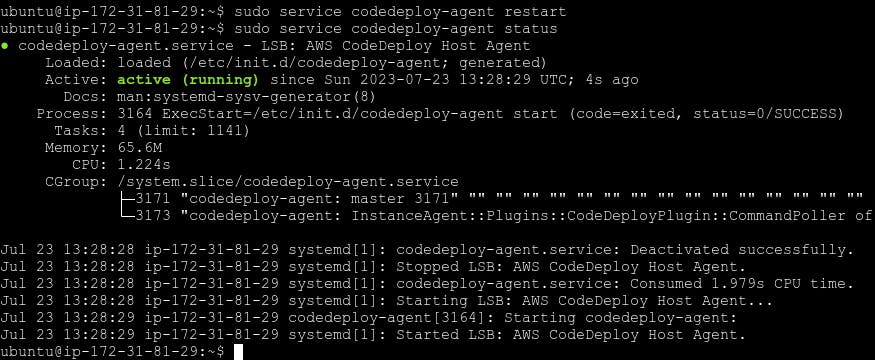
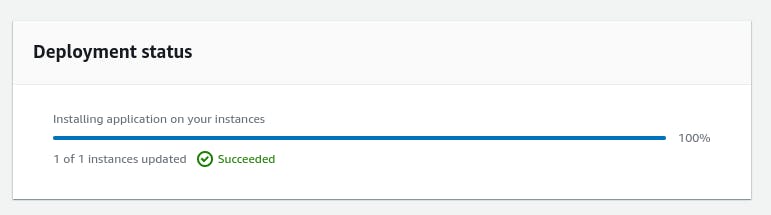
- Once the codedeploy-agent restarted, the deployment will get completed successfully.
Step8:-
- Get EC2 instance public IP and paste it into the browser and check whether our webpage is live or not.
Thank you for reading. I hope you were able to understand and learn something new from my blog.
Happy Learning!
Please follow me on Hashnode and do connect with me on LinkedIn ArnavSingh.