AWS Code Pipeline with AWS CodeCommit, CodeBuild, and CodeDeploy for Continuous Delivery
#90 DaysofDevOps Challenge - Day 53


Prerequisite: First You have to install some Prerequisites for this deployment. Click here to set up the prerequisite.
Introduction
We have a HTML code that we want to use in a scenario where multiple developers work on the same code. As soon as a developer commits the code a new build should be created, tested, and deployed automatically.
First, we Manually deploy HTML code on the Nginx web server then we automate this manual deployment to continuous integration/continuous deployment (CI/CD) using AWS Code Pipeline For this sample code.
What is AWS CodeCommit?
AWS CodeCommit is a fully managed source code repository service provided by Amazon Web Services (AWS). It allows developers to securely store and manage their Git-based code repositories in the cloud. With CodeCommit, teams can collaborate on code, easily version and track changes, and manage access control to their repositories. It provides integration with other AWS services, enabling seamless continuous integration and deployment workflows. For more detailed information, please refer to the blog post on this topic.
Below are the steps to create an AWS Code pipeline using all the native AWS tools:
Step 1: Create an AWS CodeCommit repository
Go to the AWS CodeCommit console and click "Create repository".
Give your repository a name and description, and choose whether to make it public or private.
Click "Create" to create the repository.
Once the repository is created, click the "Clone URL" button to get the URL for cloning the repository to your local machine.
Clone the repository to your local system using Git.
Create an index.html, buildspec.yml, appspec.yml file & scripts to run during codedeploy.
Write buildspec.yml file for code build & store artifacts in s3 Bucket.
version: 0.2

phases:
  install:
    commands:
      - echo Installing NGINX
      - sudo apt-get update
      - sudo apt-get install nginx -y
  build:
    commands:
      - echo Build started on `date`
      - cp index.html /var/www/html/
  post_build:
    commands:
      - echo Configuring NGINX

artifacts:
  files:
    - '**/*'
This is a build specification file written in YAML format, which is used by the AWS CodeBuild service to automate the build, test, and deployment process for your application.
The version: 0.2 at the top specifies the version of the buildspec file format being used.
The phases section contains three phases: install, build, and post_build. These phases are executed in order during the build process:
The
installphase installs the NGINX web server on the build server by running the specified commands. First, it echoes a message indicating that NGINX is being installed. Then, it updates the package list and installs NGINX using theapt-getpackage manager with the-yflag, which answers "yes" to any prompts.The
buildphase starts by echoing a message indicating that the build has started and prints the current date. It then copies theindex.htmlfile to the/var/www/html/directory on the build server, which is the default location for serving web content for NGINX.The
post_buildphase runs after thebuildphase is completed. It simply echoes a message indicating that NGINX is being configured.
The artifacts section specifies the files that should be included in the output artifact produced by the build process. In this case, the files section specifies that all files and directories in the build output should be included in the artifact. The **/* pattern matches any file or directory recursively in the build output directory.
Add Script for installing & starting NGINX Webserver:
Create a folder named scripts & Write install_nginx.sh to install Nginx
 #!/bin/bash
 sudo apt-get update
 sudo apt-get install -y nginx
This is a simple Bash script that updates the package list of your Ubuntu-based system using the
apt-getcommand and installs the Nginx web server using the same command.The first command,
sudo apt-get updateupdates the package list on your system by downloading the package information from the Ubuntu repositories. This ensures that you have access to the latest software packages and security updates.The second command,
sudo apt-get install -y nginx, installs the Nginx web server on your system. The-yoption automatically confirms any prompts that may appear during the installation process.write start_nginx.sh in scripts folder to start the Nginx webserver.
 #!/bin/bash
 sudo service nginx start
The command
sudo service nginx startstarts the Nginx web server by running thestartcommand on thenginxservice. This command tells the system to launch the Nginx process and start serving web pages.
Write appspec.yml file for codedeploy
version: 0.0
os: linux
files:
  - source: /
    destination: /var/www/html
hooks:
  AfterInstall:
    - location: scripts/install_nginx.sh
      timeout: 300
      runas: root
  ApplicationStart:
    - location: scripts/start_nginx.sh
      timeout: 300
      runas: root
The file specifies the deployment steps and actions that CodeDeploy should take when deploying an application to a Linux instance.
The version and os keys specify the version of the deployment specification file and the operating system of the target instance, respectively.
The files section specifies the files that should be copied to the instance during the deployment process. In this case, it specifies that all files in the root directory of the application source should be copied to the /var/www/html directory on the target instance. This is a common location for serving web content on Linux instances.
The hooks section specifies the lifecycle events that should trigger scripts to run on the target instance during the deployment process. In this case, there are two hooks:
The
AfterInstallhook specifies that theinstall_nginx.shscript should be run on the target instance after the application files have been copied. This script installs the NGINX web server.The
ApplicationStarthook specifies that thestart_nginx.shscript should be run on the target instance after the NGINX server has been installed. This script starts the NGINX server.
Both of these scripts are executed with root privileges (runas: root) and have a timeout of 300 seconds (timeout: 300). This ensures that the scripts have enough time to complete before the deployment process times out.
save all the files and push them to the code commits repository. Use git commands to add, commit, & push code to a repository.
- ( Note: You have a Prompt Id & Password when you push to CodeCommit)
What is AWS CodeBuild?
AWS CodeBuild is a fully managed build service in the cloud. CodeBuild compiles your source code, runs unit tests, and produces artifacts that are ready to deploy. CodeBuild eliminates the need to provision, manage, and scale your own build servers. It provides prepackaged build environments for popular programming languages and builds tools such as Apache Maven, Gradle, and more. You can also customize build environments in CodeBuild to use your own build tools. CodeBuild scales automatically to meet peak build requests.
CodeBuild provides these benefits:
Fully managed – CodeBuild eliminates the need to set up, patch, update, and manage your own build servers.
On-demand – CodeBuild scales on demand to meet your build needs. You pay only for the number of build minutes you consume.
Out of the box – CodeBuild provides preconfigured build environments for the most popular programming languages. All you need to do is point to your build script to start your first build.
I have written another detailed blog on this topic, refer to it for in-depth understanding.
Step 2: Create a CodeBuild project
Go to the AWS CodeBuild console and click "Create build project".
Give your build project a name and description.
In the "Source" section, choose "AWS CodeCommit" as the source provider and select the repository you created in Step 1. And select the Branch of your repository.
In the "Environment" section, choose a build environment that meets your requirements, such as "Ubuntu". Choose runtime as "Standard:7.0"
In the "Buildspec" section, By default, CodeBuild looks for a file named buildspec.yml in the source code root directory. If your buildspec file uses a different name or location, enter its path from the source root here (for example, buildspec-two.yml or configuration/buildspec.yml).
In the "Artifacts" section, choose "Amazon S3" as the type and specify the S3 bucket and key prefix where build artifacts should be stored.
Select the "Artifacts packaging" as a "Zip".
In the Logs Section, Untick the Checkbox of "CloudWatch logs"
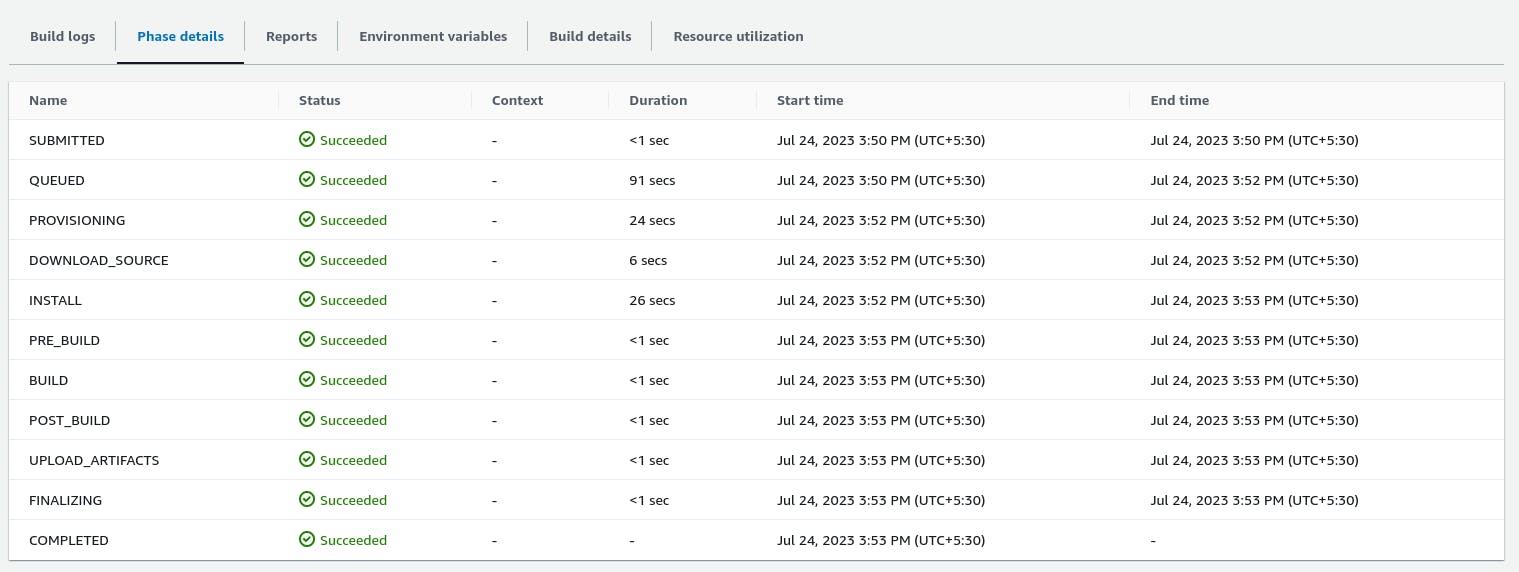
Click "Create build project" to create the CodeBuild project.
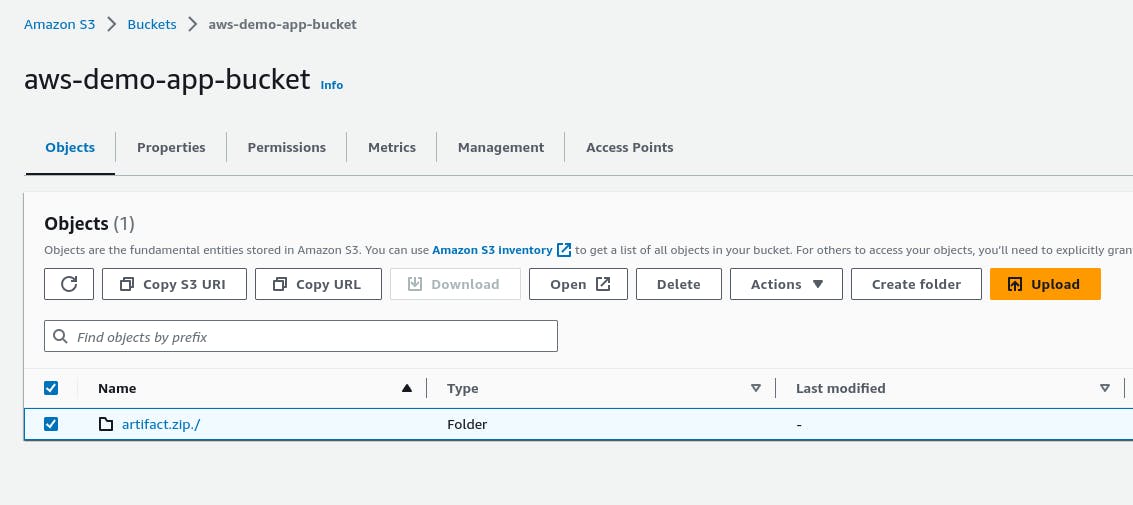
Click on Start Build. Once all the Stages are finished, the Build File will be generated in the S3 Bucket.
Check S3 Bucket for the Files
What is CodeDeploy?
CodeDeploy is a deployment service that automates application deployments to Amazon EC2 instances, on-premises instances, serverless Lambda functions, or Amazon ECS services.
You can deploy a nearly unlimited variety of application content, including:
Code
Serverless AWS Lambda functions
Web and configuration files
Executables
Packages
Scripts
Multimedia files
CodeDeploy can deploy application content that runs on a server and is stored in Amazon S3 buckets, GitHub repositories, or Bitbucket repositories. CodeDeploy can also deploy a serverless Lambda function. You do not need to make changes to your existing code before you can use CodeDeploy.
I have written another detailed blog on this topic, refer to it for in-depth understanding.
What is AWS CodePipeline?
AWS CodePipeline is a continuous delivery service you can use to model, visualize, and automate the steps required to release your software. You can quickly model and configure the different stages of a software release process. CodePipeline automates the steps required to release your software changes continuously.
Benefits:
Automation of Build, Test, and Release Processes.
Pipeline History Reports and Pipeline Status Visualizations
Establish a consistent release process.
Speed up delivery while improving quality.
Supports external tools integration for source, build, and deployment.
Step 3: Create a CodeDeploy application and deployment group
Go to the AWS CodeDeploy console and click "Create application".
Give your application a name, Select "Compute platform" As "EC2/On-premises" and click "Create application".
Once the application is created, click "Create deployment group" to create a new deployment group for the application.
Give your deployment group a name, Select the service role, and choose the Amazon EC2 instances where we will deploy the application
In "Environment configuration" Select "Amazon EC2 instances" and then select "key" as a "Name" & "Value" as "InstanceName". (Note:- Select the instance that you created in the prerequisites section and which has already installed CodeDeploy Agent)
Select "Never" in "Install AWS CodeDeploy Agent" & "Unselect Enable load balancing"
Click "Create deployment group" to create the deployment group.
Congratulations! Your application is now running on an EC2 IP address. But, wait, it's not over yet. We have automated this deployment through AWS CodePipeline.
Step 4: Create a CodePipeline
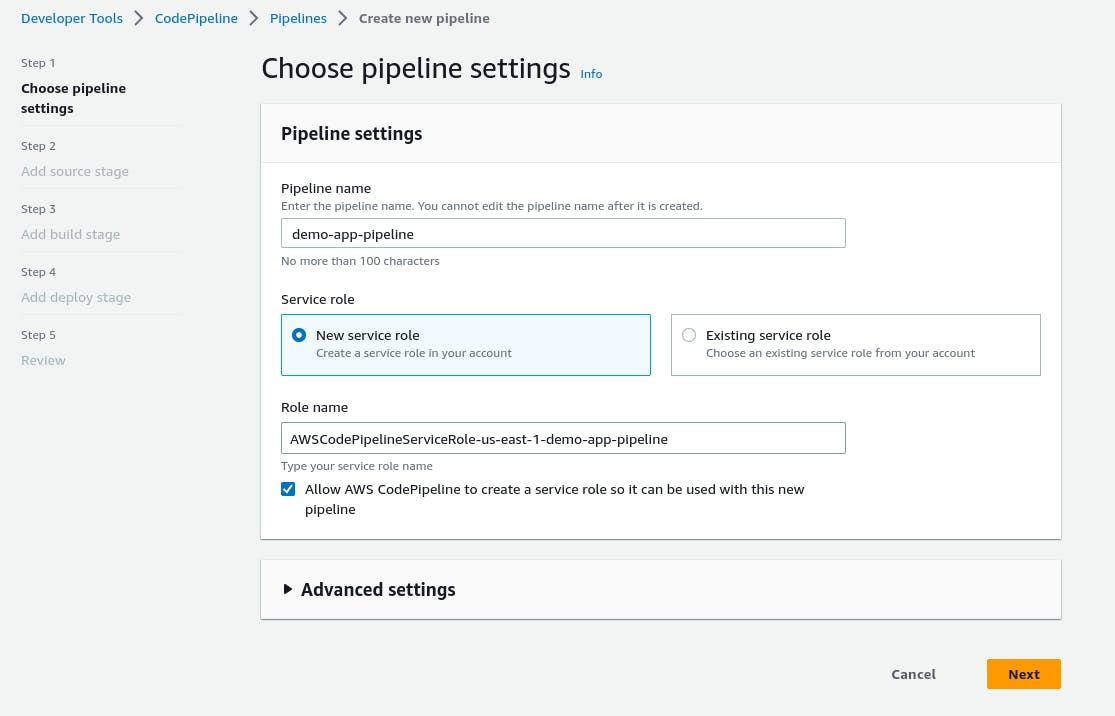
Go to the AWS CodePipeline console and click "Create pipeline".
Give your pipeline a name and click "Next".
In the "Source" section, choose "AWS CodeCommit" as the source provider and select the repository & branch you created in Step 1.
Select "Change detection options" as "AWS CodePipeline" and then "Next".

In the "Build" section, choose "AWS CodeBuild" as the build provider and select the CodeBuild project you created in Step 2 and click "Next".

In the "Deploy" section, choose "AWS CodeDeploy" as the deployment provider and select the application name and deployment group that you created in Step 3 and click "Next".

Review once & click "Create pipeline". It will take time to complete all the steps.
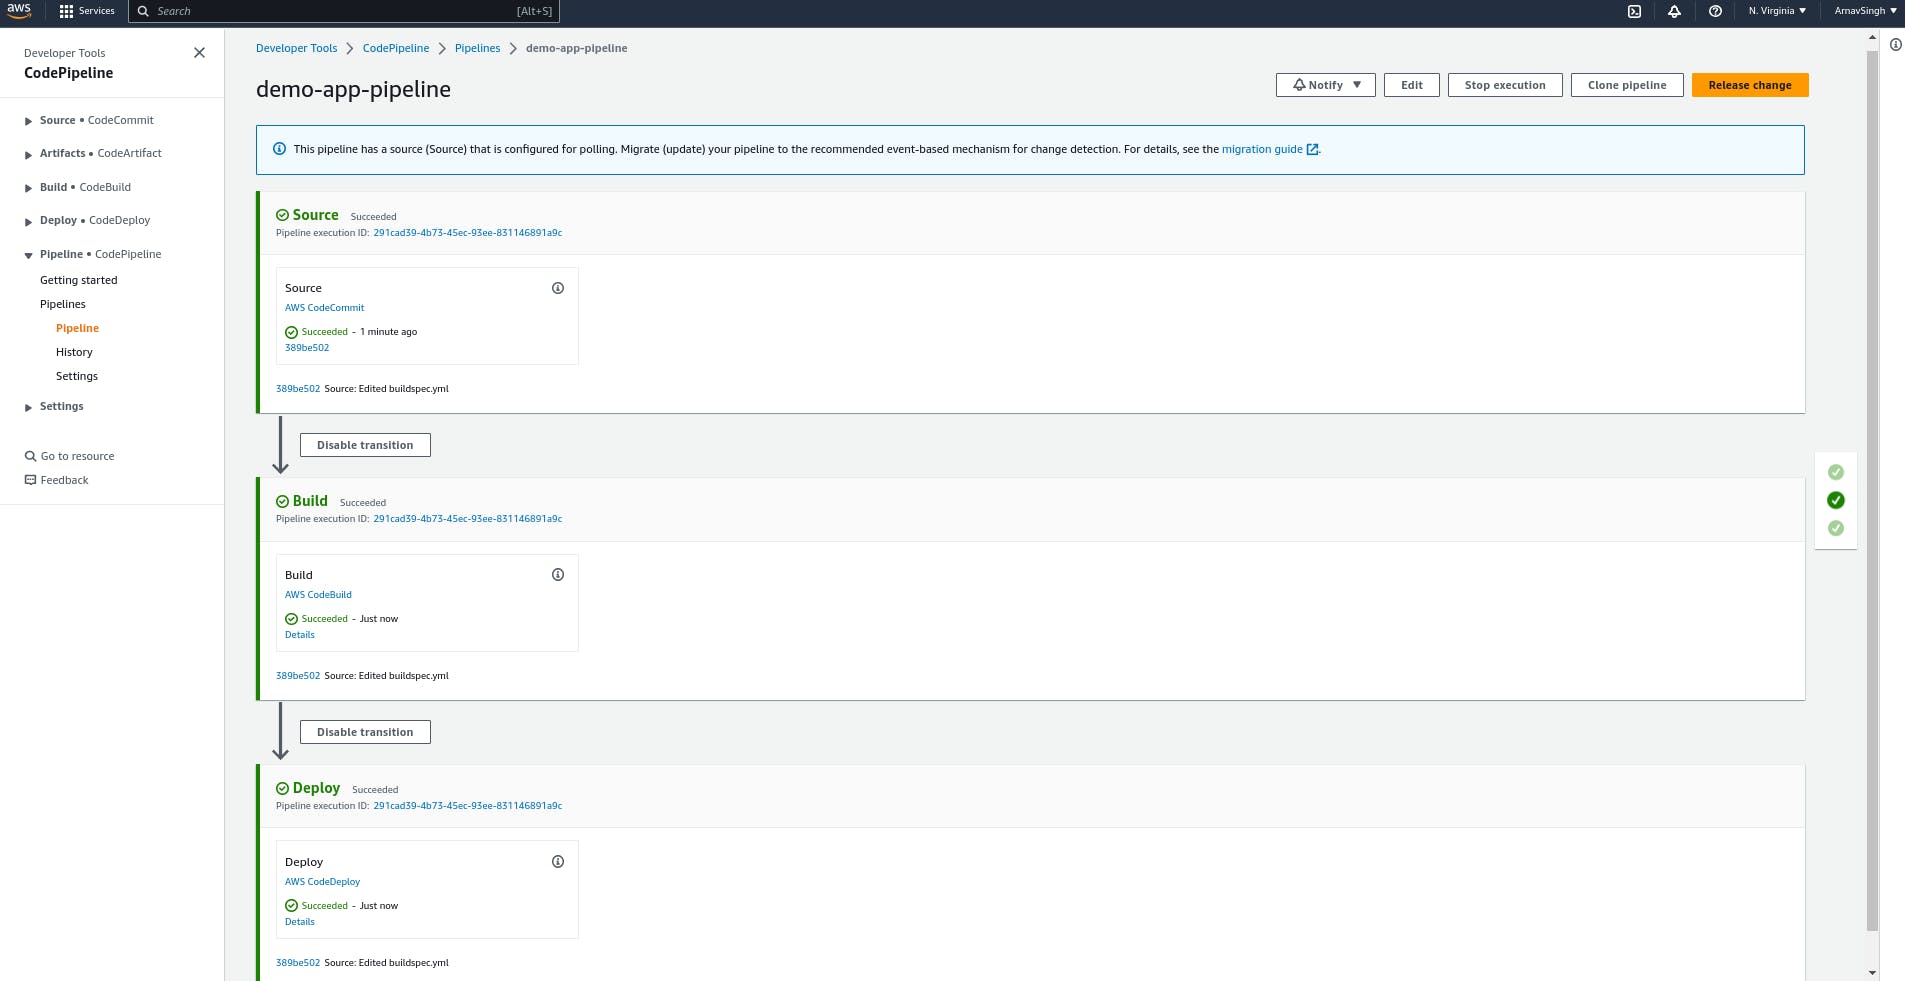
Congratulations🎊 Your application is now running on an EC2 IP address We have automated this deployment through AWS Code Pipeline with AWS Code Commit, Code Build & Code Deploy.

You have the ability to modify your HTML page and upload it to codecommit. Once uploaded, the pipeline will initiate automatically and deploy the updated application. You have the option to set up an alarm for this specific pipeline and receive a notification when it is activated.
Thank you for reading. I hope you were able to understand and learn something new from my blog.
Happy Learning!
Please follow me on Hashnode and do connect with me on LinkedIn ArnavSingh.